First, a small and trivial confession: I have been a Linux system administrator since 1998, running big Linux servers that host web pages and email systems. I have also, reluctantly, become a Windows server system administrator, but that is a story for another time. For most of that time, I have earned at least part of my living due to Linux servers, but used a Windows desktop for my personal workstation. I used Linux exclusively on my laptop from 2003-2006, and had a good experience, although during that era you had to be prepared to re-compile your XFree86 subsystem to support DRI for video playback, and things like wifi and power sleep mode were tricky to configure. I have also had Linux laptops for “salesman’s demos” where I wanted to be sure that my website would load during the demo no matter what. I have kept a Linux server at home for many years, mostly for experimentation, but also to serve as a VPN entry point and media file server. However, I have never been “pure” in my adoption or advocacy.
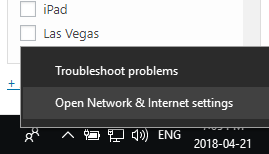
Over the past few weeks since returning from a vacation in Las Vegas, I have intended to write several blog posts about using Linux as a personal desktop. In business, there is the concept of the 80/20 rule: the 20% of features that are needed 80% of the time. With the Windows desktop, I have found, there is a 1/10 rule: the 1% of features needed 10% of the time. Put simply, while I must use Windows at work as it is the corporate standard, I would prefer to use a Linux desktop at home. This post is about keeping Windows in its place: not allowing the occasional need for Windows to allow it to dominate desktop computing by having one killer feature. I have done this using a combination of multiple-boot, virtualization, platform diversity, and remote desktop access. Yes, I know about Wine and Crossover emulation, but I classify those as stupid computer tricks.
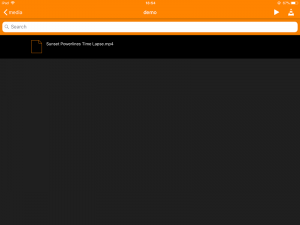
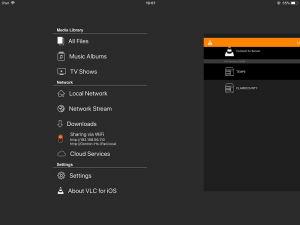
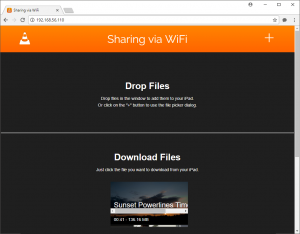
People can argue about the relative technical merits of Windows vs other desktop operating systems, and the strengths and deficiencies of Linux as a desktop. For personal use, my most common tools are Chrome for the web, VLC for videos, and few utilities like FileZilla for file transfer, VNC for remote desktop work, and Putty for SSH terminal access (it is worth observing that all of these tools are themselves open source). The occasional Word file can usually be read by LibreOffice, the free Word clone included in most desktop Linux distributions. As for the rest of the edge cases that require an actual Windows workstation, read on.
Free as in freedom (libre), not just free as in free beer
2 of my computers include legal licenses for Windows that came with the hardware, so cost or license compliance is not my primary concern. I think that the term Libre is more accurate than Free, as it immediately dispenses with the distinction “free as in freedom, not just free as in free beer.”
Windows as a security vector
As a desktop operating system, Windows is dangerous. It has poor security, despite hard work by Microsoft and others to improve its defenses. Linux provides a faster, more stable desktop experience, and is more secure — by virtue of its architecture and the intense peer review of open source code. On the minus side, Linux on the desktop is limited in terms of the number of apps that it supports. Although several core apps such as Chrome, common on Windows, are now available on Linux, there is always a mission-mandatory application, like Sage 50 Accounting or Photoshop, that does not exist for desktop Linux or for which there is an acceptable substitute.
Last summer, before a corporate merger, I traveled to Toronto for a long weekend, carrying an Acer netbook (weak CPU, 2GB RAM, 32GB eMMC hard drive) that only ran Linux. I was able to support my internal IT clients using an OpenVPN client, remote desktop to run servers, and TeamViewer (which actually produces a Linux version!) to do remote support tech support tickets. I also had the option of connecting to a Windows computer via remote desktop in order to run Windows-specific software. Post-merger, my new employer uses a kind of VPN for which there is not current Linux support — there is documentation about an older 32 bit version, and I have seen and tried a few howtos to add older 32 bit libraries, logical links to .so files, and other tricks to support the obsolete Linux version of the VPN client, but have thus far not been successful in connecting to the new corporate VPN. A perfect illustration of how Windows needs only one critical app to “win” and ensure its place on a computer desktop.
The netbook: multiple-boot for vacations
Often, when I visit Las Vegas, my flight arrives several hours before I can check into my hotel, and there is not even a paid option to check in early. In those cases, I must leave my luggage with the bell captain and wander the Strip, homeless until checkin. So I travel with the tiniest laptop ever, a netbook that fits into a half-size laptop case, with enough room for an iPad and a few accessories like the power brick, a mouse, and a usb charger battery for my phone. Having a small computer is great when you are stuck in an airport lounge, on a train or bus.
Late last year, I purchased an HP Stream 11, with an 11.6” display and a limited CPU that is branded Celeron, and is technically a 64 bit CPU with 2 cores, but is essentially 1.5 times the speed of an old Atom CPU. This matters less than you would think as the Intel graphics card is fast for video playback and makes graphical desktops fast and responsive despite a weak CPU. Unlike most netbooks on the market, this machine has 4GB instead of 2GB RAM, and a 64GB instead of 32GB eMMC drive. This means that a) the machine has enough RAM to run Windows 10, and b) the drive is big enough to house partitions for both Windows and Linux boot partitions.
Multiple boot because Windows not optional and netbook too limited for virtualization
There are many things you can do with a netbook. Virtualization is not one of them: I did the experiments. There is something cruel about asking a 1.5Ghz Celeron CPU with 2 cores and 4GB of RAM to host a virtual guest, and the results were not pretty. I had a second chance to work with virtualization on another laptop with better specs, but that is discussed later in this blog post.
Creating a multiple boot between Windows and Linux
There are many good howtos on formatting a computer for multiple boot with Windows and Linux, but here are the essentials. If you are formatting an empty hard drive, only partition some of the space on the hard drive, and leave the rest as “unallocated.” Do the full Windows install. Then, run the Linux installer and tell it to use automatic partitioning – it will create a second boot partition for Linux, and even install a multiple-boot menu allowing you to choose between Linux and Windows at boot time. Of the usable 57GB portion of the 65GB eMMC drive, I allocated 35GB to Windows and 22GB to Linux – next time, I may allocate 40GB windows and 17GB Linux. If you want to add a Linux boot partition to a machine that already has Windows, you can use a bootable USB “Live” version of Linux and the gparted utility to re-partition the Windows partition to free up space that is then “unallocated” on the hard drive.
Docker containers for Linux/Apache/MySQL/PHP (LAMP) development
I support several large enterprise applications written in PHP. Although I have seen PHP run on Windows, I consider it a stupid computer trick. PHP works best as part of a LAMP stack. The problem with PHP is that its developers deprecate (drop as obsolete) functions and features quite aggressively. This means that although in theory a Linux laptop would make an excellent LAMP server, a modern desktop distribution of Linux contains a version of PHP that is too modern to run the enterprise code that I maintain (yes, there are re-factoring projects underway).
I listened to several presentations about Docker and Snap containers, and related technologies like Puppet and Ansible, during meetings at my Linux Meetup group. Each time, I thought the presentations were on a subject too esoteric to be of use to me, but as with most presentations to which I have listened in that group, the information was useful to me at a later time. In my case, I have chosen to use Docker containers for PHP 5.x and PHP 7.x development (see my previous blog post, “Formatting a netbook with dual boot Windows and Linux, plus a Docker container for travel and offline LAMP development.”) These containers allow me to host several incompatible versions of PHP with full isolated environments of Apache and MariaDB (MySQL), without the CPU and RAM overhead of virtualized guest machines. The performance is quite good.
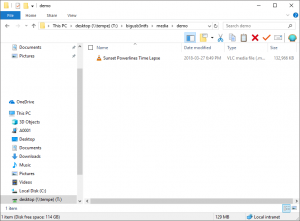
The server: a Linux server at home to serve media files
At home, I have an old Vista-class (Core 2 Duo) computer upgraded to 4GB RAM and 120GB SSD, which I use as a personal server. The RAM and SSD make this machine faster than it was when originally deployed in 2007. Unlike my other personal computers, this machine does not have dual-boot, virtual guests, or Docker containers, it is a pure bare-metal Linux server with no multiple boot. I use it as a file server for media files at home, a VPN server to access my home network, and as an rsync server to backup my personal VPS web server. This machine has a Linux desktop which offers mediocre performance. Although the computer can display a 1080p movie without stutter using VLC, its Gnome desktop is not snappy – my 2017 netbook with a weaker CPU but better video card provides a better desktop experience – dialogs and interfaces respond more quickly.
Formattting my best personal computer as multiple boot between Windows and Linux
I have a personal laptop with good specs – i7 CPU, 16GB RAM, 1TB SSD. This machine is connected to an external monitor, keyboard, and mouse to serve as my desktop computer at home. Until recently, this computer (the computer I use the most while at home) ran Windows. Why did this computer, the best computer in the house, get Windows? Because Windows always wins due to the occasional need for a Windows-only tool. What if I need to connect to the VPN at work? What if I have to run Photoshop? What if I need real Excel to run a spreadsheet with VBA macros?
After mostly using a Linux laptop during my vacation (although I had the Windows boot available for Windows-only tasks like the work VPN), I was curious about how well Linux could host virtual machine guests running Windows and Linux on decent hardware. I was also determined to free myself from the need for Windows at home, for security, stability, and privacy. Given today’s threat environment, using a Windows computer seems dangerous. I also figured that the performance of a Linux desktop would be even faster than the same hardware under Windows.
I booted a live USB of Fedora Linux, installed the gparted tool using dnf (yum), then I used gparted to reduce the size of the Windows partition. This created free “unallocated” space. I then ran the Linux installer, and selected auto-partitioning. Linux used the unallocated space, created its own partition, and a multiple-boot menu that allows me to choose between Windows and Linux at boot time.
Building virtual machines under Linux with KVM/QEMU
Using the virt-manager tool, I was able to build a Windows virtual guest running Windows 10. Based on advice from the Internet, I used a raw file image, and allocated 4GB RAM and 2 CPU cores. I discovered a few quirks — for example, you have to install a non-existent “EVTouch USB Graphics Tablet” input device to get rid of mouse stutter, and you have to change the buffer values for pulseaudio. I was able to create a virtual Windows desktop that had great performance for everything except video and audio playback, which had stutter. Unless you tried to play a movie or music file, this virtual guest performed so well that in full-screen it was almost indistinguishable from a desktop running on real bare metal. This guest vm allowed me to connect to the work VPN.
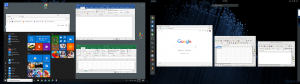
For fun, I also created a virtual guest of Fedora 28 desktop. It ran extremely well. I have used this virtual guests to perform experiments (for example, if a desktop is connected via VPN client to another system, is its desktop still accessible remotely via VNC? Answer: yes.) I have been able to run both the Windows and Linux virtual machines at the same time, with each connected to a different VPN while the main foreground desktop runs on the regular Internet connection.
Keeping the Windows multiple-boot option available
Although I have not yet needed to reboot into real, bare-metal Windows on my main personal computer at home, I feel better knowing that it is there. If I need to spend a day converting video, or running Photoshop, I can boot back into Windows. Preserving the ability to run Windows makes it possible for me to run Linux as the primary operating system on the bare metal of that machine.
A final note: multiple physical computers
After all this experimentation, I found that instead of using virtual guests for downloading and access to Windows, I was relying on separate physical computers. In a typical session, my main desktop runs on Linux, my server runs Linux connected via a privacy VPN, my netbook runs in Windows mode. My server and netbook are available physically as well as virtually, via VNC remote desktop software.
Of course, I would never have known just how well Linux can run a virtual machine guest had I not reformatted the machine. I am glad that I have retained the ability to choose between Windows and Linux at boot time on 2 of my 3 personal computers. Mostly, I am glad to be able to run Linux on my main home and travel machines, by keeping the theoretical ability to run Windows for the edge cases that usually let it win the war for the desktop.