
TL;DR
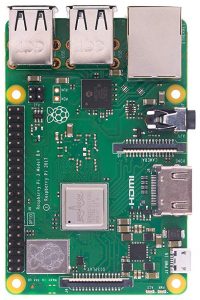
The recent release of Fedora 29 for the Raspberry Pi means that the hobbyist hardware platform can finally be considered as a viable alternative to Windows-on-Intel (“Wintel”) hardware to host Linux server applications. Although too slow to operate as a useful Graphical User Interface (“GUI”) desktop, the Pi does a good job running a text-only web, file, and vpn server. This makes Fedora on Pi perfect for serving video files at home, or as a vpn server for a small home office or satellite office.
Actual practical HOWTO section
This section contains actual procedural information. After the practical information, there is a “Rant section.”
Choosing the version you will install
For now, I suggest you avoid the GUI desktop altogether and stick with a text-only web, file, and vpn server based on Fedora 29 Minimal.
Downloading the Fedora 29 image file
Download the file for Fedora Minimal:
https://alt.fedoraproject.org/alt
How this is different from a Wintel install
A Wintel build consists of boot media, either a usb drive or a dvd drive, which contains a bootable image that includes an installer used to format another device, typically a hard drive, with boot and other partitions.
The Raspberry Pi Fedora installer consists of an ISO image you will image to a micro-SD card. In the Pi world, everything boots from a FAT32 UEFI partition on a micro-SD card.
Understanding the Fedora 29 image file
The Fedora 29 image contains a FAT32 partition with an implementation of UEFI, and several ext4 partitions.
Decompressing the file containing the Fedora 29 image file
In Windows, use WinRAR to decompress the image file.
In Linux:
from: https://fedoraproject.org/wiki/Architectures/ARM/Raspberry_Pi
xzcat Fedora-IMAGE-NAME.raw.xz | sudo dd status=progress bs=4M of=/dev/XXX # Location of your media (will be sdX or mmcblkX depending on hardware)
Formatting the micro-SD card with the image
Windows:
https://sourceforge.net/projects/win32diskimager/
Linux:
(Decompression and image write to media part of the same operation above under “Decompressing the Fedora image file”)
Using a partition tool to expand the / partition on the micro-SD card
Windows:
https://www.easeus.com/partition-manager/epm-free.html
Linux:
gparted /dev/XXX
Following the text setup wizard
On first boot, at the bottom of the screen, you will see a set of questions regarding initial system username, password, and other settings. Follow the wizard – make sure you create a root password, The system will boot.
Rebooting into a standard machine
You will boot into a standard Linux login screen. Login as root.
Doing standard housekeeping and a standard build
From this point on in the build, the machine feels like a “normal” Linux box.
Using nmcli to set a static ip address
https://unix.stackexchange.com/questions/290938/assigning-static-ip-address-using-nmcli
Using dnf to install nano, rsync, and net-tools
A lot of things that you take for granted, like nano, rsync, and ifconfig (part of net-tools), do not exist until you add them with dnf.
Editing the selinux config file
https://www.centos.org/docs/5/html/5.1/Deployment_Guide/sec-sel-enable-disable.html
Modifying or disabling firewalld
systemctl stop firewalld; systemctl disable firewalld
(some people like firewalls, I think they are lazy – just turn off unneeded ports!)
Enabling an SSHD server
systemctl start sshd; systemctl enable sshd
Adding the rpmfusion repos
https://rpmfusion.org/Configuration
dnf clean all; dnf update
reboot
Doing a standard LAMP build
https://www.digitalocean.com/community/tutorials/how-to-install-lamp-linux-apache-mysql-php-on-fedora
(notes: dnf install mariadb mariadb-server instead of dnf install mysql mysql-server, dnf install php-mysqlnd instead of dnf install php-mysql)
Installing a free cert with Let’s Encrypt
https://letsencrypt.org/
Installing Nextcloud
Normally, I would just say, dnf install nextcloud and watch yum dependencies in action. Unfortunately, there is a missing dependency for php-composer(ircmaxell/password-compat) which breaks nextcloud in yum/dnf. This is not a good thing, however it is not specific to the Pi, it is a Fedora 29/Nextcloud thing (and it would appear that Owncloud and Nextcloud do not get a lot of maintainer love in the yum repos).
As it happens, I was able to deploy nextcloud 2 weeks ago on a cloud server using this script, and it worked just as well on this installation of Nextcloud on Fedora on the Pi:
https://help.nextcloud.com/t/fully-automated-nextcloud-on-fedora-installation-script/27276
Doing a standard Samba build
https://www.digitalocean.com/community/questions/installing-configuring-samba-on-centos-7-droplet
Optimizing Samba file shares, especially for MacOS Finder clients:
http://blog.gordonbuchan.com/blog/index.php/2018/10/21/fixing-slow-macos-finder-on-samba-file-share-optimizing-for-windows-clients/
Doing a standard OpenVPN build
http://blog.gordonbuchan.com/blog/index.php/2018/01/28/a-corrected-procedure-for-the-installation-of-openvpn-on-fedora-27/
Enabling the rc-local service in system
https://www.linuxbabe.com/linux-server/how-to-enable-etcrc-local-with-systemd
Rant section
Although some people like the rant, others just want a HOWTO. So the rant goes here, after the practical.
It is a big deal that Fedora treats the Pi’s aarch64 as equal to Wintel’s x64
The ability to use standard Red Hat software tools and procedures means that aside from differences in the installation process, the Pi feels like a normal, if slightly slow, Red Hat machine. Because Fedora on Pi has full standard repositories, you can use standard howtos and procedures to do a build.
Until now, Linux was effectively relegated to dumpster-diving Wintel boxen
Intel hardware originally designed for Windows is the commodity computing platform on which Linux was born. It is comforting to know that Linux now has a second viable hardware platform, which will grow in capability over time.
A motorcycle engine trying to power a car
I remember a TV show where a team of mechanics scoured a junkyard and found a motorcycle engine powerful enough to drive a car-sized frame, chassis, and wheels. The motorcycle engine was large by motorcycle standards – and was able to power the car form factor, but it struggled with the task. Like the motorcycle engine in the TV show, the Pi is now powerful enough to run a full Red Hat Linux (Fedora) server, but it struggles with a full GUI desktop like Gnome 3 or XFCE.
Vision and leadership and big decisions by Fedora and rpmfusion yum repo maintainers
The big decision by Fedora to provide full support for the Pi’s aarch64 ARM cpu gives Linux its own hardware platform, for the first time. The Fedora project maintainers and the rpmfusion repo maintainers did an excellent job of ensuring that the yum repositories contained aarch64 binary rpm packages for everything that had an x64 package. Let me just say it is inspiring to see people with vision actually execute and do something like this.
Using standard procedures and software libraries
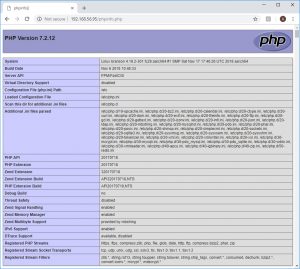
What is impressive is that the main yum repositories for fc29, as well as the rpmfusion free and non-free repositories, fully support aarch64. That means you can dnf install vlc filezilla, and it will work. Some repositories are not there yet, such as the remi rpm repo for php56 support on modern fedora, so I will be limited to php72 for the moment. Some third-party repos, like google-chrome, do not yet support aarch64, however I was able to install Chromium.
What the Pi is not so good at: GUI desktop
When I first installed Fedora 29 Workstation on the Pi, the GUI was virtually unusable. It became better over time, but would sometimes freeze. I turned off the Gnome 3 desktop, did all the dnf updates, then turned on Gnome 3. After a few tweaks with the Gnome tweaks took I was able to run LibreOffice Writer, Chromium, and FileZilla, but only very slowly. XFCE was slightly faster but not enough to make a difference. Although rpmfusion allowed me to dnf install vlc, VLC was virtually unusable – but props to everyone in that value chain for vision – a hardware rev or 2 from now the VLC will be usable.
The Pi is fast as a text server
I decided to go the other way and install a text-only server from the ground up. There are some Raspberry Pi-specifics to the build I will address in the Install procedure section. However, the rest was identical to the way one would build a wintel linux box. On my brother’s advice, I decided to use Fedora 29 Minimal. It really is minimal: I had to use dnf to install nano and rsync. However, I was able to do a dnf update including the rpmfusion free and non-free repositories. Because I had full standard repositories, I could use standard howtos and procedures to do my build.
I then built a standard LAMP web server, an SSL cert with let’s encrypt, an installation of nextcloud media server, samba file share server, openvpn vpn server. The server performed well – so well that I am already planning to deploy a few in the field as openvpn servers and rsync backup data dumps.
A random reference to a satirical book about home servers
https://gizmodo.com/342499/microsofts-brainwashing-childrens-book-mommy-where-do-servers-come-from