
Previous step: Chapter 3: Buying an Ubuntu Linux cloud server from Digital Ocean
Next step: Chapter 5: Configuring an Ubuntu Linux cloud server to create a Linux Apache MySQL PHP (LAMP) web server, Part 1
Web presence step by step is a series of posts that show you how to build a web presence.
In this post, we learn how to use an SSH terminal program to connect to an Ubuntu Linux cloud server.
Windows
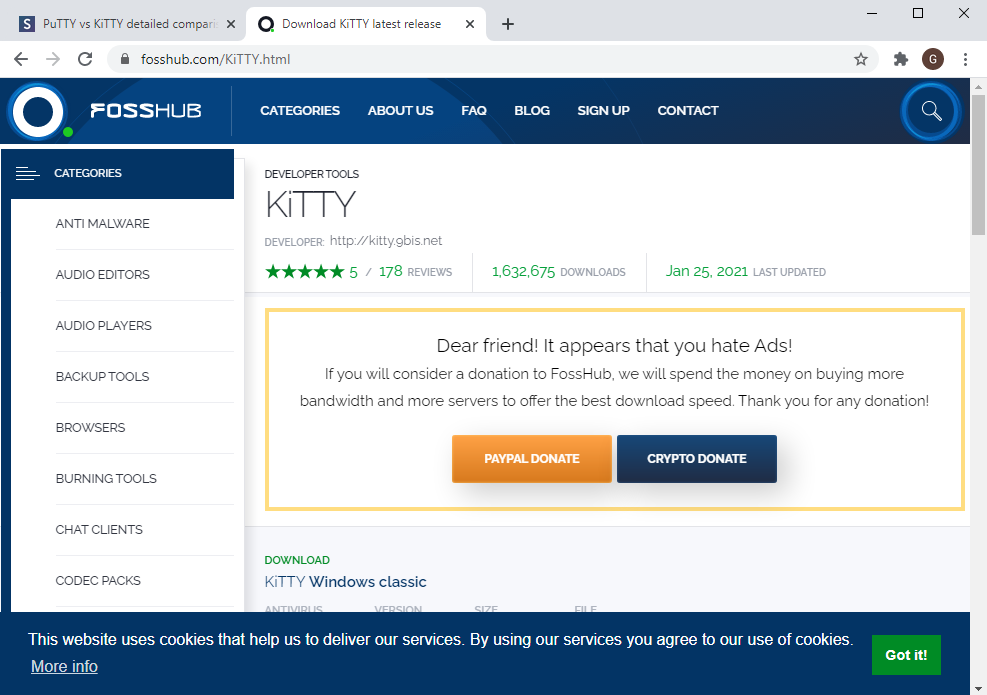
Visit this link to download the KiTTY SSH terminal program for Windows:
https://fosshub.com/KiTTY.html
Click on “Got it!” to remove the message at the bottom. Click on “DOWNLOAD KiTTY Windows classic”:
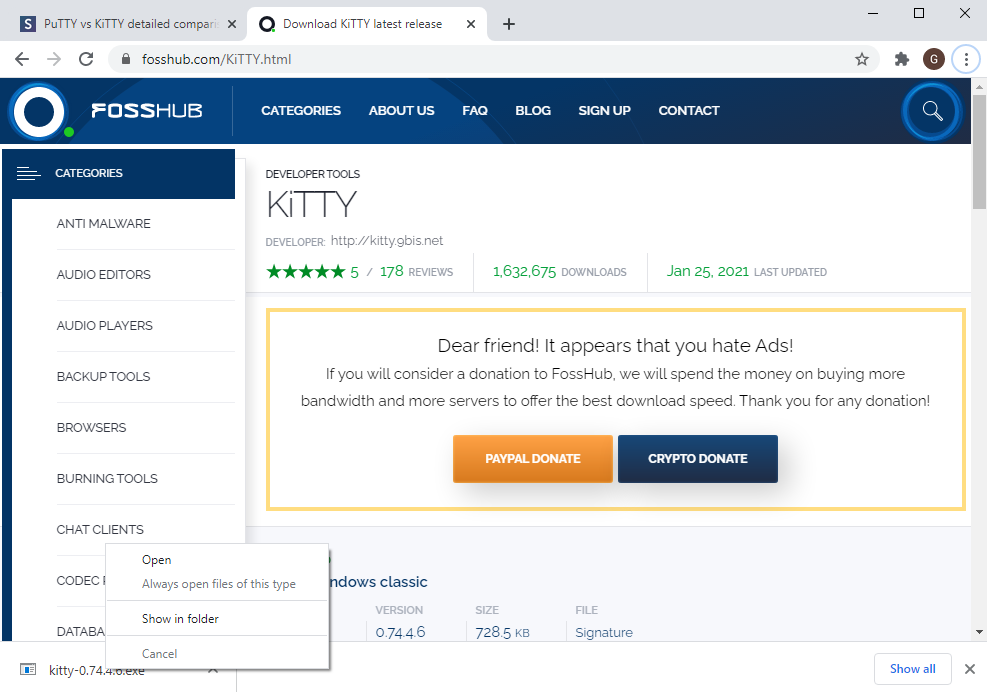
In the lower-left of your browser, right-click on the name of the downloaded file. Select “Show in folder”:
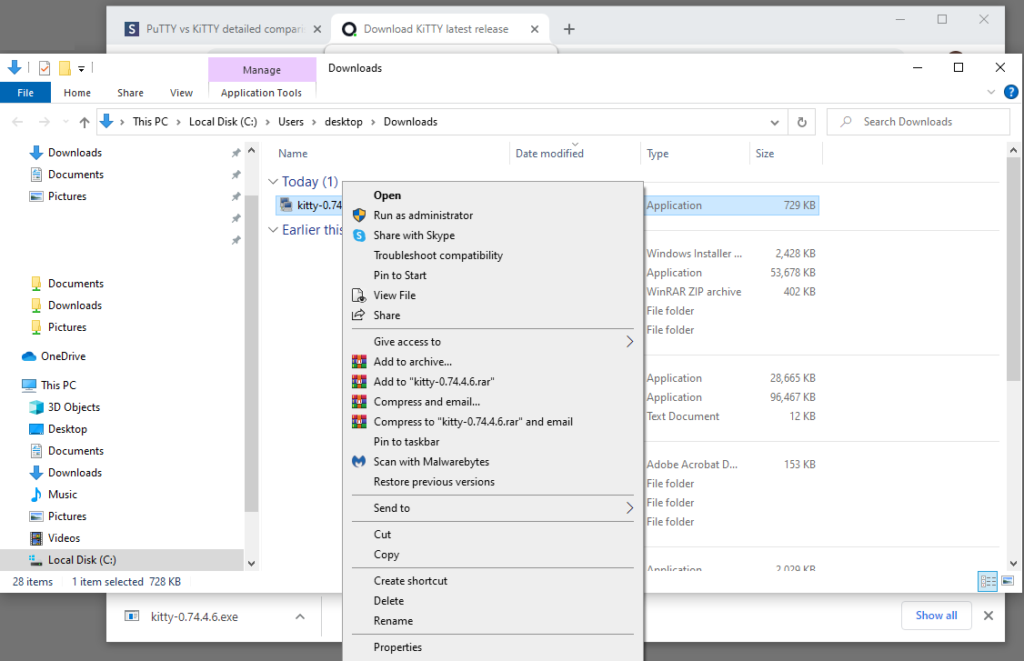
Right-click on kitty program. Click “Open”:
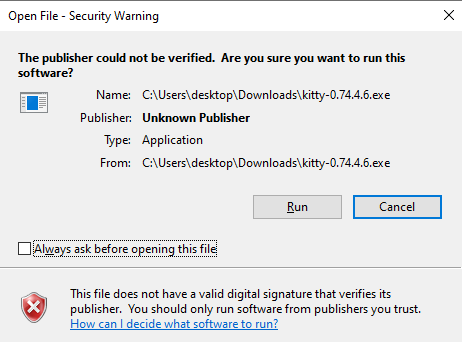
Un-check the box “Always ask before opening this file.” Click “Run”:
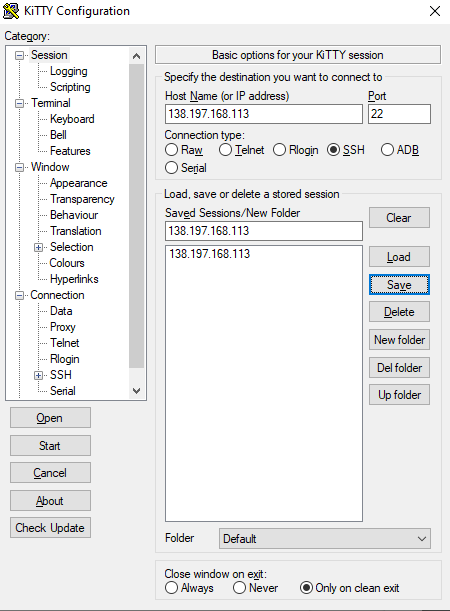
Host Name (or IP address): enter the IP address of your cloud server
Port: 22
Connection type: SSH
Saved Sessions/New Folder: enter the IP address of your cloud server
Click Save. Click Open:
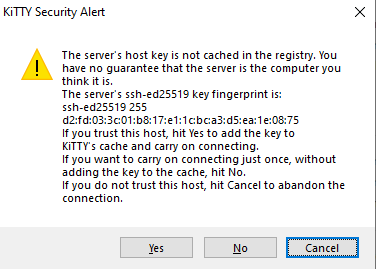
The following warning appears. Click Yes:
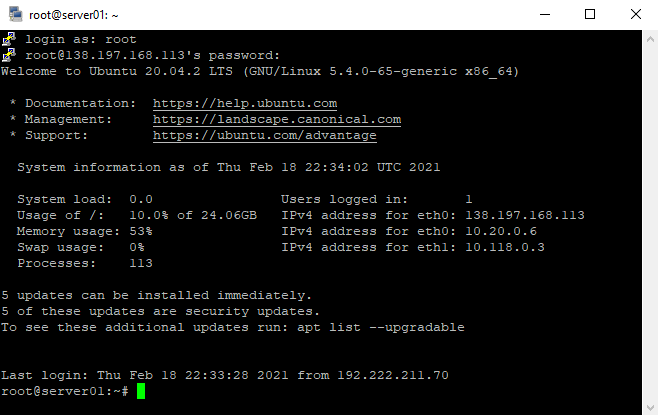
A terminal window appears. This is what it looks like after you login::
MacOS
From Finder, go to Applications. From the Applications folder, double-click on Utilities:
Scroll down and locate the Terminal application. Double-click to start Terminal:

A Terminal window appears:
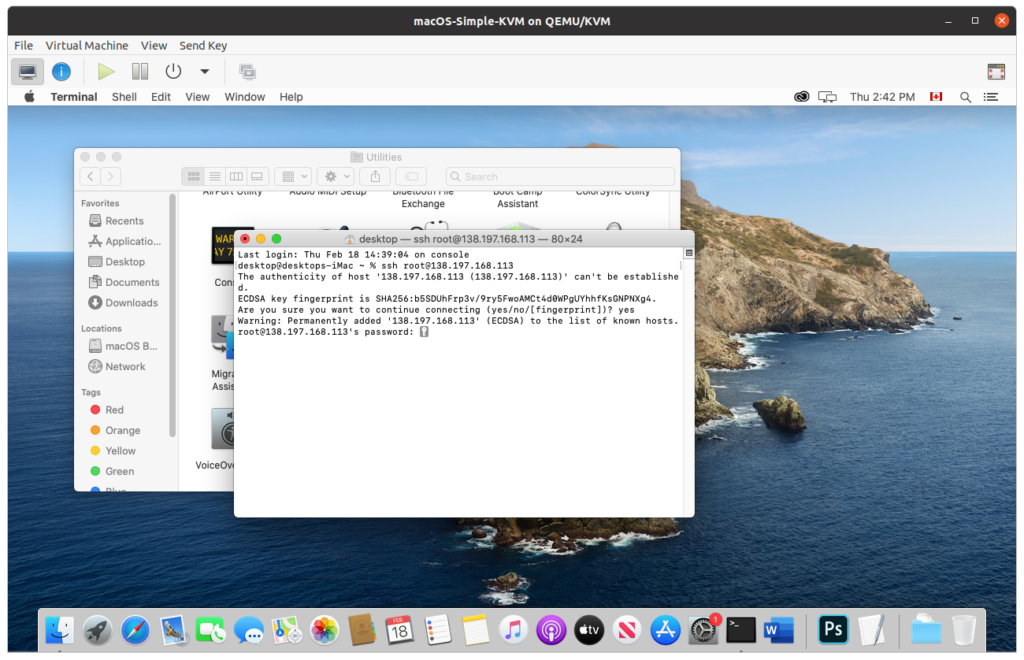
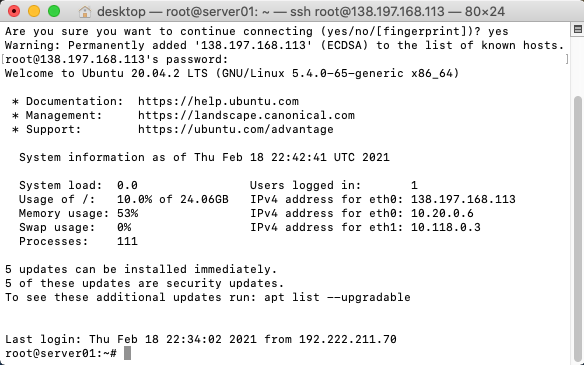
From this window, enter the command: root@ipaddressofyourcloudserver, substituting the IP address of your cloud server. This is what it looks like after you login:
Linux
There are 2 ways to launch the Terminal program under Linux.
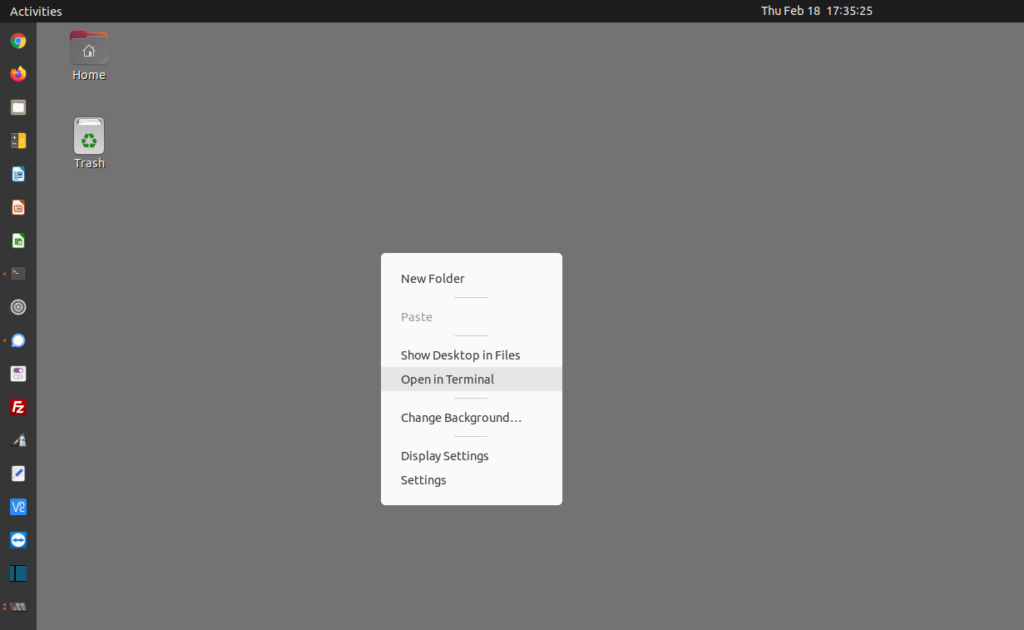
Opening a Terminal session by right-clicking on the desktop
Right-click on the desktop. Select “Open in Terminal”:
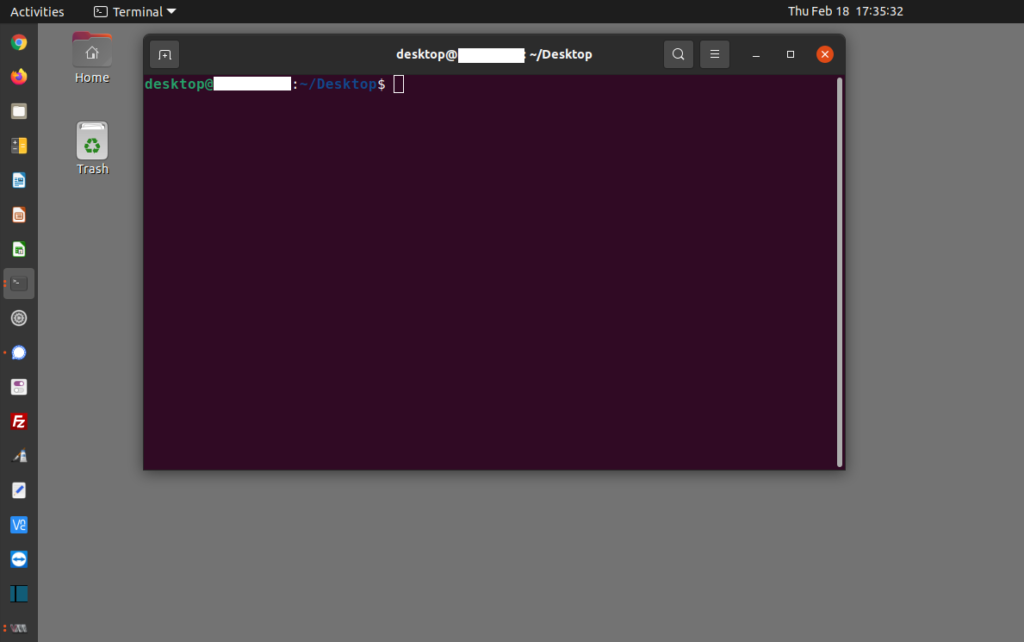
A Terminal window appears:
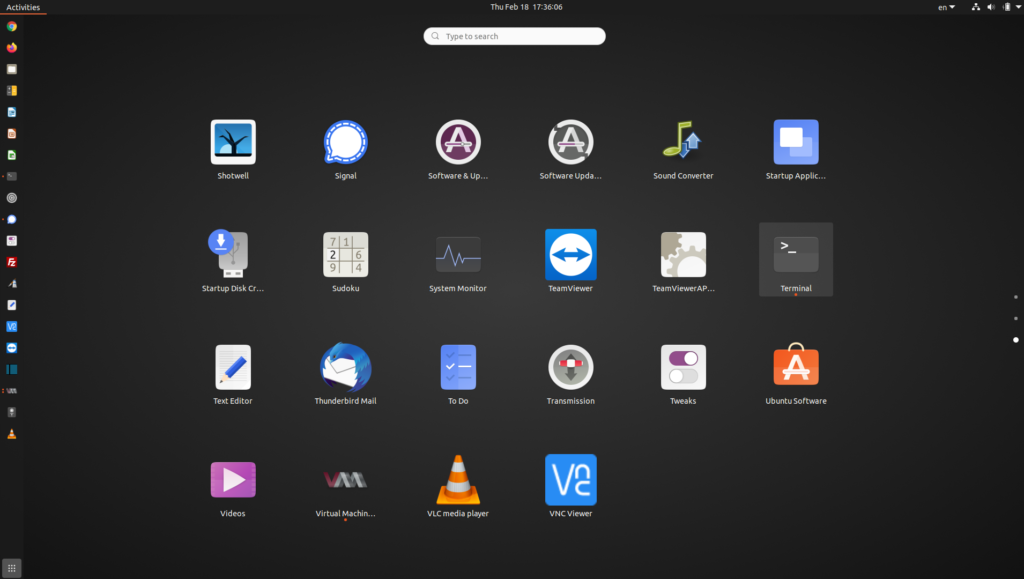
Opening a Terminal session by clicking “Show Applications”
Click on the icon in the lower-left of your desktop to “Show Applications.” Scroll down to find the terminal program,
or enter the word “terminal” in the box “Type to search”:
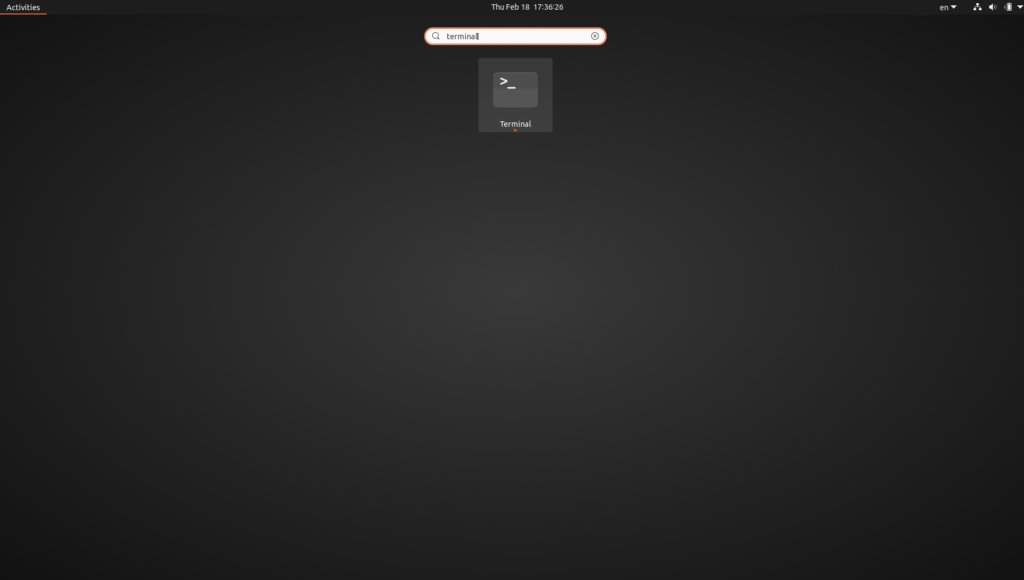
A Terminal window appears:

From this window, enter the command: root@ipaddressofyourcloudserver, substituting the IP address of your cloud server:

This is what it looks like after you login:

Previous step: Chapter 3: Buying an Ubuntu Linux cloud server from Digital Ocean
Next step: Chapter 5: Configuring an Ubuntu Linux cloud server to create a Linux Apache MySQL PHP (LAMP) web server, Part 1