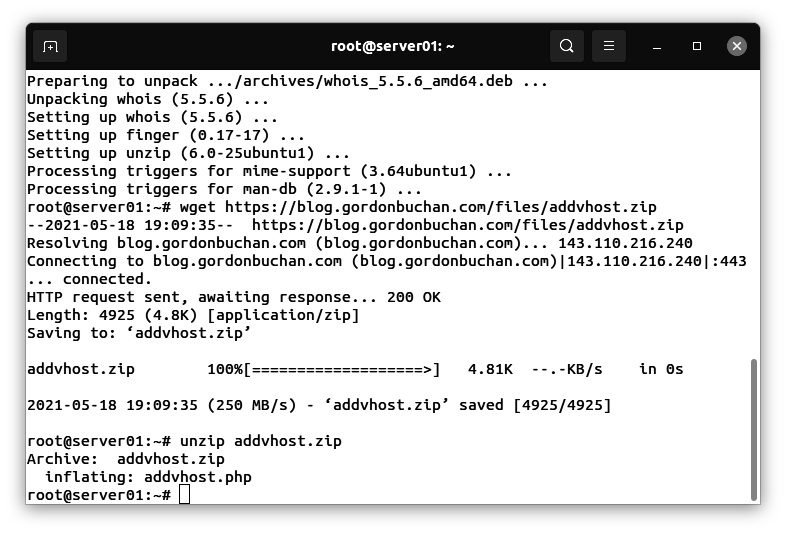
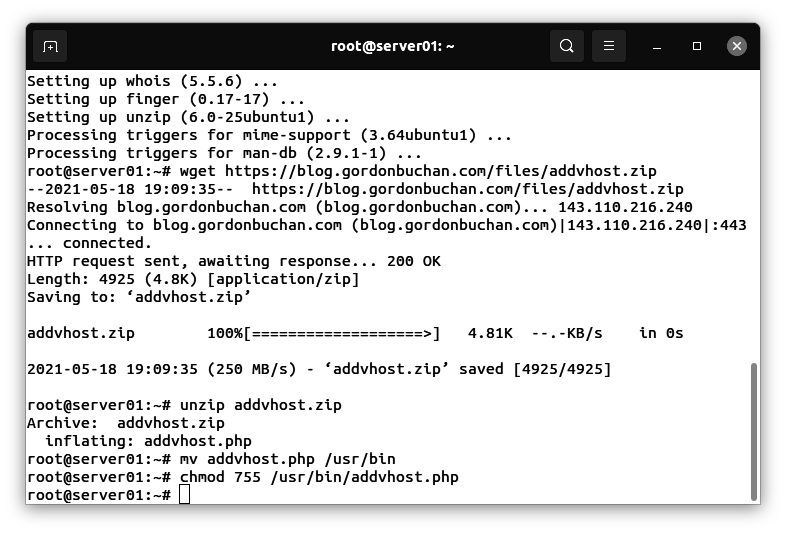
Previous step Chapter 16: Using a script to automate the creation of a virtual host on an Apache web server
Next step: Chapter 18: Installing VirtualBox on a computer running Windows to host Linux as a virtual machine (VM) guest
Web presence step by step is a series of posts that show you to how to build a web presence.
In this post, we learn how to declare multiple subdomain names under a single domain name for use as virtual host names, for multiple separate websites.
Understanding virtual hosts and their relation to domain and subdomain names
A shared LAMP web server can host multiple websites, or “virtual hosts,” named after domain and subdomain names.
You may wish to host a web-based application like MyBB or Nextcloud as its own website, rather than as a subdirectory of an existing website, without purchasing an additional domain name.
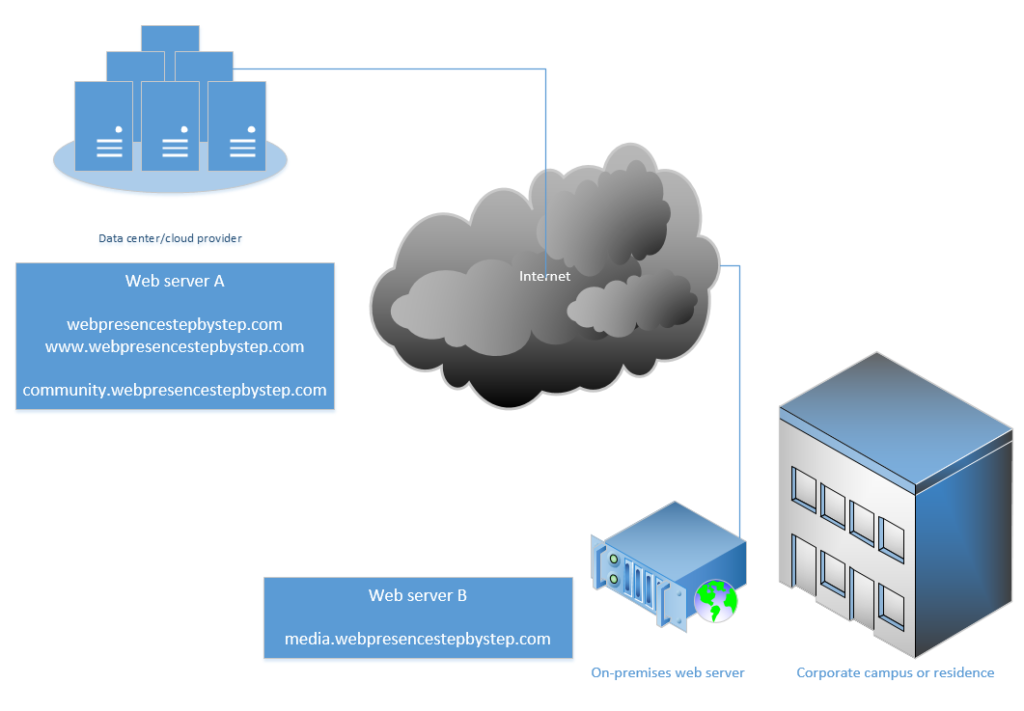
Multiple subdomains can be hosted on the same web server, or on different web servers.
The bare domain and the www subdomain
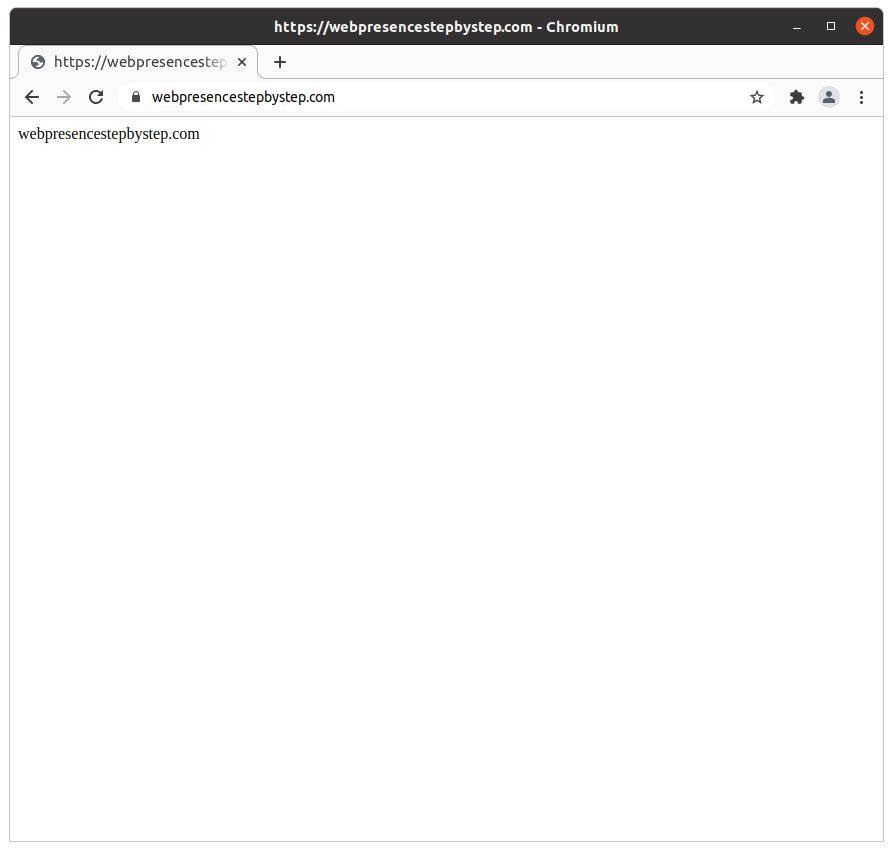
A virtual host can be identified by a “bare” domain name like “webpresencestepbystep.com,” or by a subdomain name, like “www.webpresencestepbystep.com” — by convention, the www subdomain prefix points to the same content as the “bare” domain name.
Additional subdomains like “community” and “media”
Additional subdomain names can be declared like “community.webpresencestepbystep.com” and “media.webpresencestepbystep.com” – these subdomains can point to separate websites on the same web server, or on different web servers.
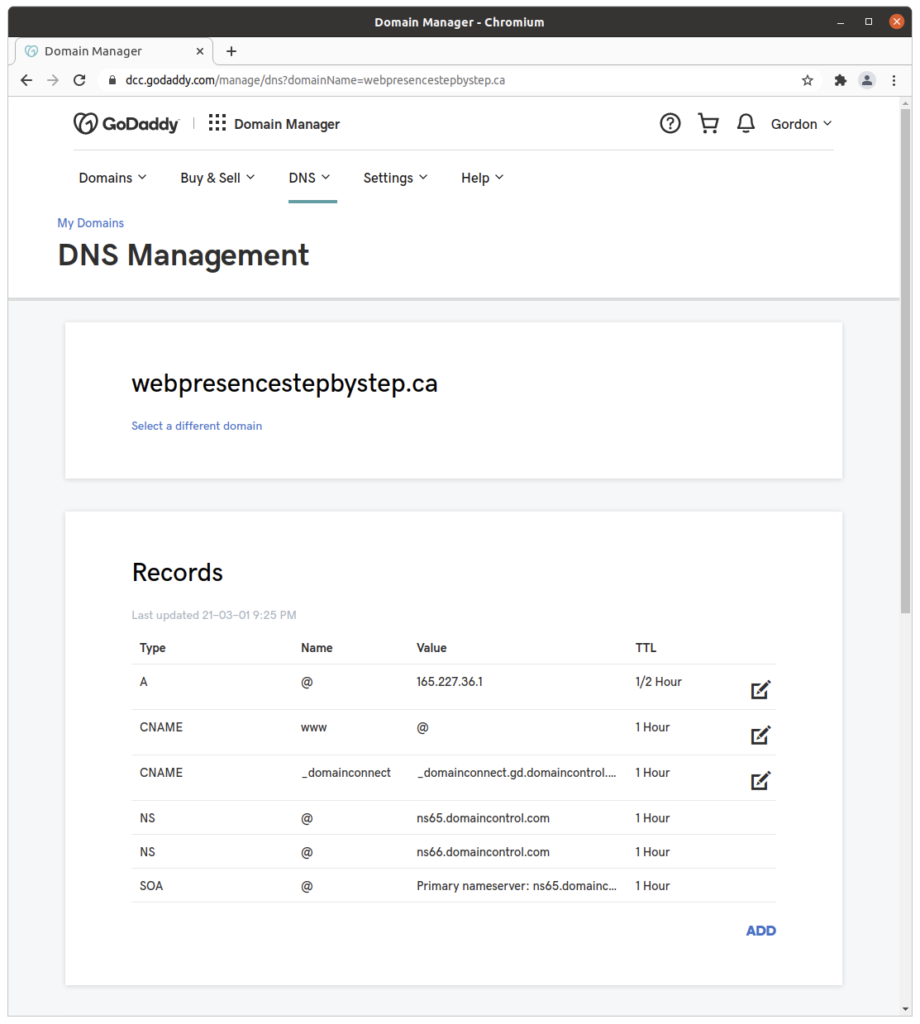
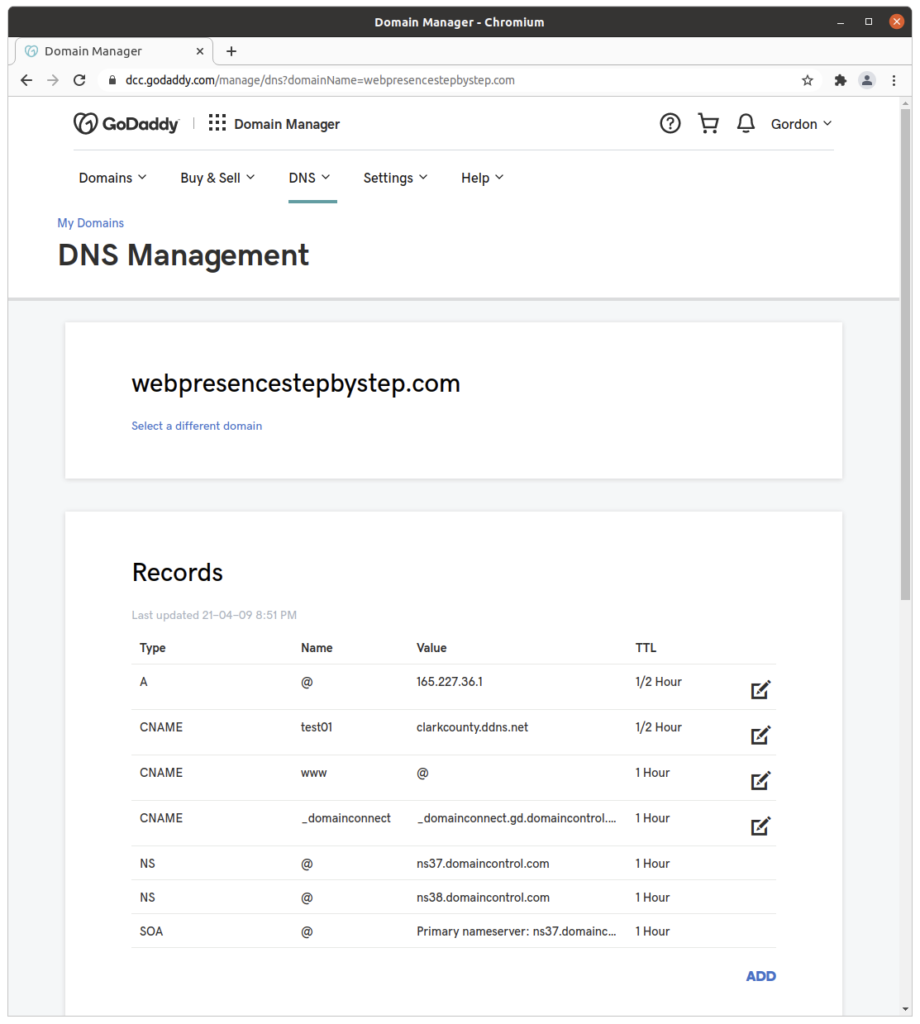
Understanding domain and subdomain names and their relation to Domain Name System (DNS) zone files
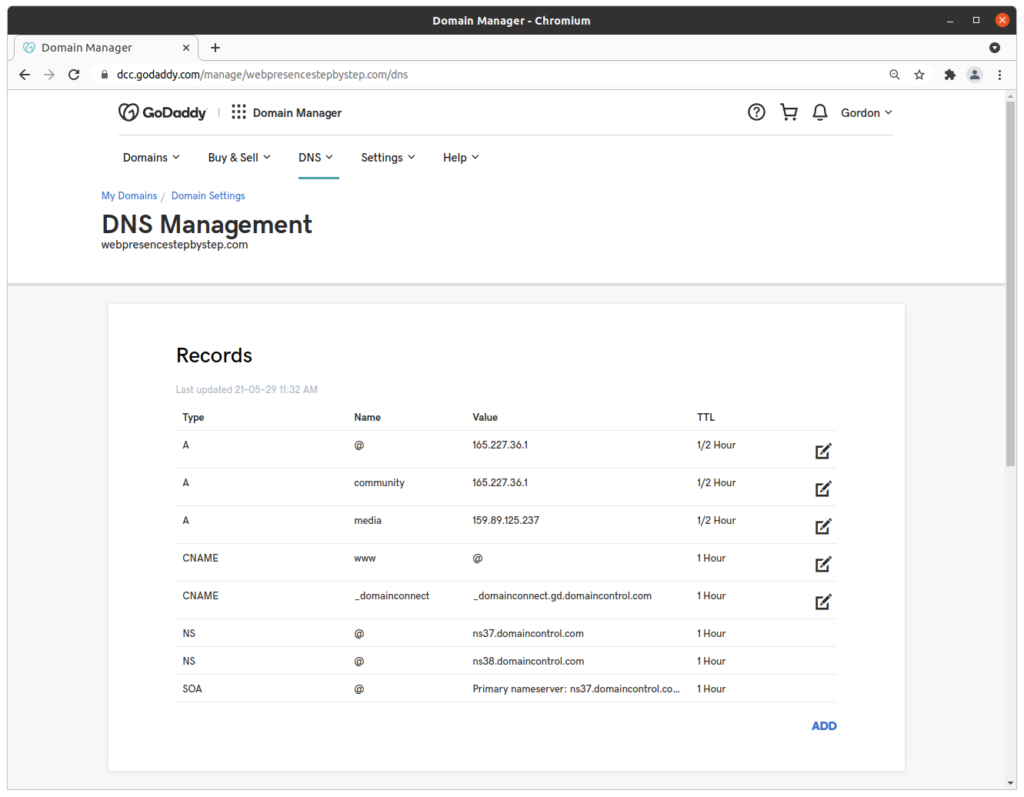
As we can see in the DNS zone for the domain, the host names “@” (“bare domain”) and “community” are A declarations associated with the IP address of web server A.
The host name “www” is a CNAME declaration associated with the host name “@” so implicitly is associated with the IP address of web server A.
The host name “media” is an A declaration associated with the IP address of web server B.
2 websites on web server A, 1 website on web server B, all as subdomains of a single domain name
By using multiple subdomains of the same domain name, 3 separate websites can be declared, with 2 websites hosted on web server A, and 1 website hosted on web server B, without the need to purchase additional domain names.
Bare domain and subdomain www on web server A
webpresencestepbystep.com and www.webpresencestepbystep.com on web server A
A note about www and CNAME
the subdomain “www” host name is a canononical name (“CNAME”) of the @ host name, which identifies the “bare” domain. This means that www.webpresencestepbystep.com will resolve to the same IP address as webpresencestepbystep.com
Virtual host profiles
/etc/apache2/sites-available/webpresencestepbystep.com.conf:
# generated 2021/05/18 19:42:53 EDT by addvhost.php
<VirtualHost *:80>
<IfModule mpm_itk_module>
AssignUserID webpresencestepbystep_com webpresencestepbystep_com
</IfModule>
ServerName webpresencestepbystep.com
ServerAlias www.webpresencestepbystep.com
DocumentRoot /usr/web/webpresencestepbystep_com/webpresencestepbystep.com
ServerAdmin info@yourdomain.com
CustomLog /var/log/apache2/webpresencestepbystep.com-access_log combined
ErrorLog /var/log/apache2/webpresencestepbystep.com-error_log
RewriteEngine on
RewriteCond %{SERVER_NAME} =webpresencestepbystep.com [OR]
RewriteCond %{SERVER_NAME} =www.webpresencestepbystep.com
RewriteRule ^ https://%{SERVER_NAME}%{REQUEST_URI} [END,NE,R=permanent]
</VirtualHost>
/etc/apache2/sites-available/webpresencestepbystep.com-le-ssl.conf:
<IfModule mod_ssl.c>
<VirtualHost *:443>
<IfModule mpm_itk_module>
AssignUserID webpresencestepbystep_com webpresencestepbystep_com </IfModule>
ServerName webpresencestepbystep.com
ServerAlias www.webpresencestepbystep.com
DocumentRoot /usr/web/webpresencestepbystep_com/webpresencestepbystep.com ServerAdmin info@yourdomain.com CustomLog /var/log/apache2/webpresencestepbystep.com-access_log combined ErrorLog /var/log/apache2/webpresencestepbystep.com-error_log Include /etc/letsencrypt/options-ssl-apache.conf SSLCertificateFile /etc/letsencrypt/live/linuxstepbystep.com/fullchain.pem SSLCertificateKeyFile /etc/letsencrypt/live/linuxstepbystep.com/privkey.pem
</VirtualHost>
</IfModule>
Website

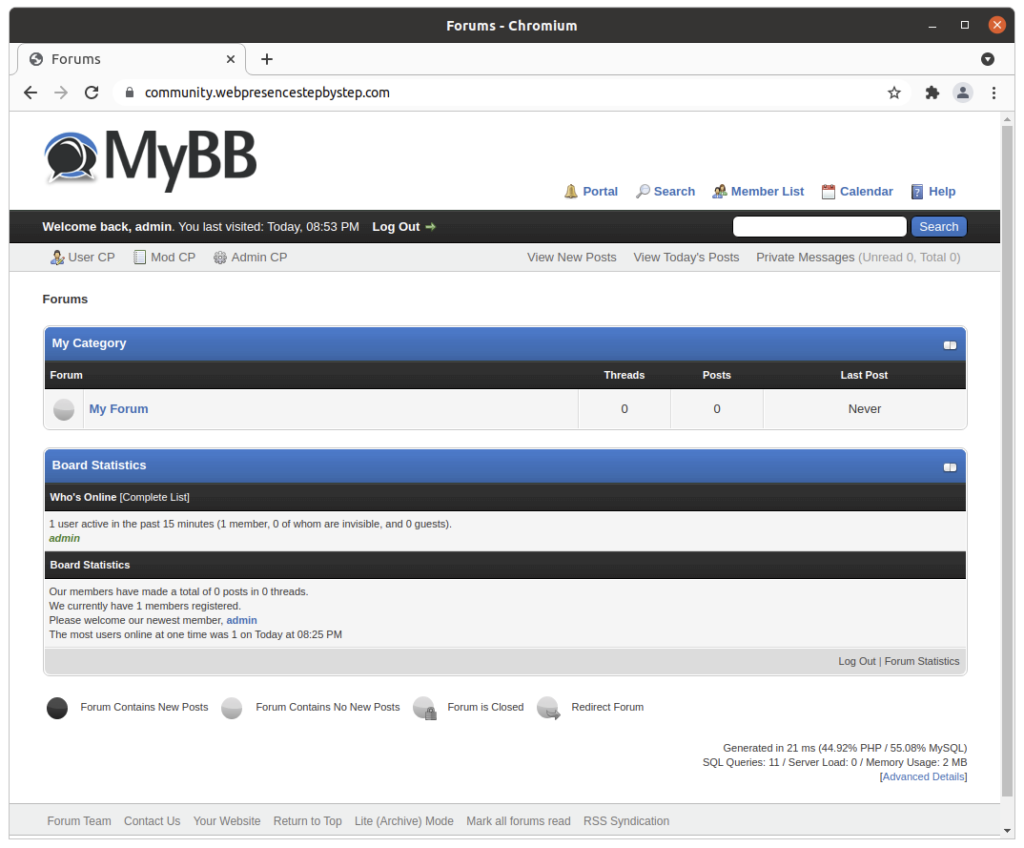
Subdomain community on web server A
community.webpresencestepbystep.com on the same IP address, on web server A
Virtual host profiles
/etc/apache2/sites-available/community.webpresencestepbystep.com.conf:
# generated 2021/05/29 12:45:14 EDT by addvhost.php
<VirtualHost *:80>
<IfModule mpm_itk_module>
AssignUserID community_webpresencestepbystep_ community_webpresencestepbystep_
</IfModule>
ServerName community.webpresencestepbystep.com
DocumentRoot /usr/web/community_webpresencestepbystep_/community.webpresencestepbystep.com
ServerAdmin info@yourdomain.com
CustomLog /var/log/apache2/community.webpresencestepbystep.com-access_log combined
ErrorLog /var/log/apache2/community.webpresencestepbystep.com-error_log
RewriteEngine on
RewriteCond %{SERVER_NAME} =community.webpresencestepbystep.com
RewriteRule ^ https://%{SERVER_NAME}%{REQUEST_URI} [END,NE,R=permanent]
</VirtualHost>
/etc/apache2/sites-available/community.webpresencestepbystep.com-le-ssl.conf
<IfModule mod_ssl.c>
<VirtualHost *:443>
<IfModule mpm_itk_module>
AssignUserID community_webpresencestepbystep_ community_webpresencestepbystep_
</IfModule>
ServerName community.webpresencestepbystep.com
DocumentRoot /usr/web/community_webpresencestepbystep_/community.webpresencestepbystep.com
ServerAdmin info@yourdomain.com
CustomLog /var/log/apache2/community.webpresencestepbystep.com-access_log combined
ErrorLog /var/log/apache2/community.webpresencestepbystep.com-error_log
SSLCertificateFile /etc/letsencrypt/live/linuxstepbystep.com/fullchain.pem
SSLCertificateKeyFile /etc/letsencrypt/live/linuxstepbystep.com/privkey.pem
Include /etc/letsencrypt/options-ssl-apache.conf
</VirtualHost>
</IfModule>
Website
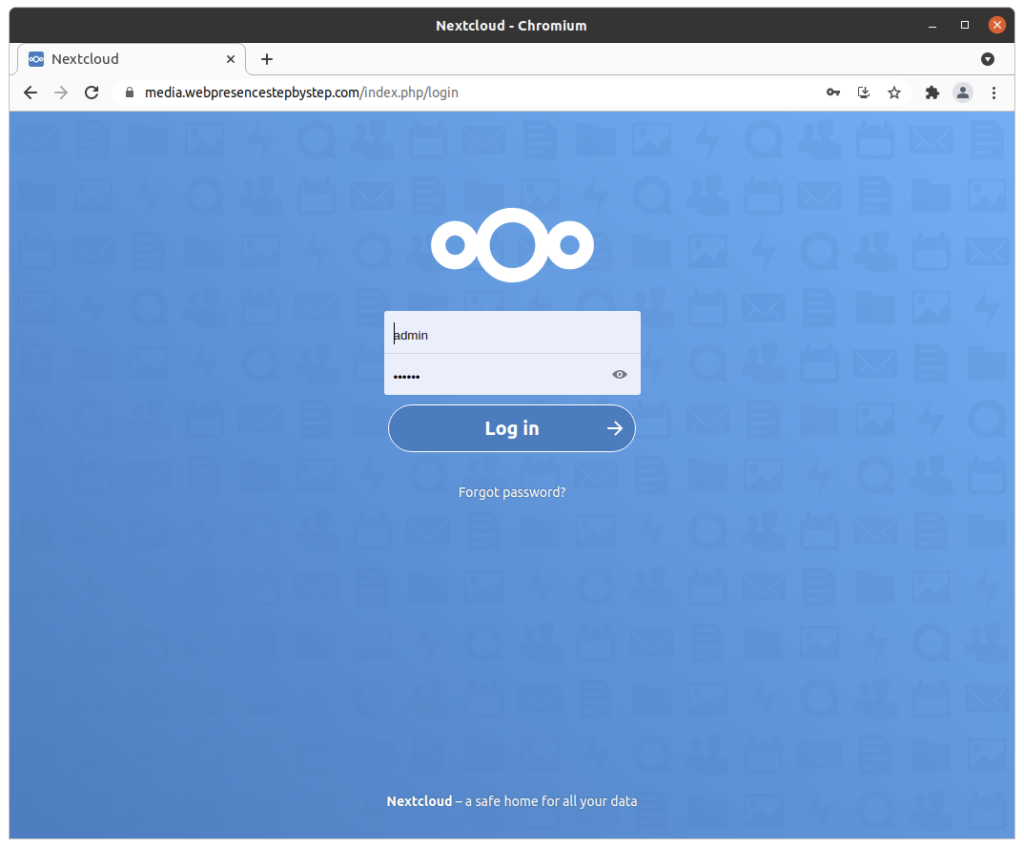
Subdomain media on web server B
media.webpresencestepbystep.com on a different IP address, on web server B
Virtual host profiles
/etc/apache2/sites-available/media.webpresencestepbystep.com.conf:
# generated 2021/05/29 17:12:33 UTC by addvhost.php
<VirtualHost *:80>
<IfModule mpm_itk_module>
AssignUserID media_webpresencestepbystep_com media_webpresencestepbystep_com
</IfModule>
ServerName media.webpresencestepbystep.com
DocumentRoot /usr/web/media_webpresencestepbystep_com/media.webpresencestepbystep.com
ServerAdmin info@yourdomain.com
CustomLog /var/log/apache2/media.webpresencestepbystep.com-access_log combined
ErrorLog /var/log/apache2/media.webpresencestepbystep.com-error_log
RewriteEngine on
RewriteCond %{SERVER_NAME} =media.webpresencestepbystep.com
RewriteRule ^ https://%{SERVER_NAME}%{REQUEST_URI} [END,NE,R=permanent]
</VirtualHost>
/etc/apache2/sites-available/media.webpresencestepbystep.com-le-ssl.conf
<IfModule mod_ssl.c>
<VirtualHost *:443>
<IfModule mpm_itk_module>
AssignUserID media_webpresencestepbystep_com media_webpresencestepbystep_com
</IfModule>
ServerName media.webpresencestepbystep.com
DocumentRoot /usr/web/media_webpresencestepbystep_com/media.webpresencestepbystep.com
ServerAdmin info@yourdomain.com
CustomLog /var/log/apache2/media.webpresencestepbystep.com-access_log combined
ErrorLog /var/log/apache2/media.webpresencestepbystep.com-error_log
SSLCertificateFile /etc/letsencrypt/live/media.webpresencestepbystep.com/fullchain.pem
SSLCertificateKeyFile /etc/letsencrypt/live/media.webpresencestepbystep.com/privkey.pem
Include /etc/letsencrypt/options-ssl-apache.conf
</VirtualHost>
</IfModule>
Website
Previous step Chapter 16: Using a script to automate the creation of a virtual host on an Apache web server
Next step: Chapter 18: Installing VirtualBox on a computer running Windows to host Linux as a virtual machine (VM) guest