
Previous step: Chapter 5: Configuring an Ubuntu Linux cloud server to create a Linux Apache MySQL PHP (LAMP) web server, Part 1
Next step: Chapter 7: Configuring the SSH server on an Ubuntu Linux cloud server to limit SFTP directory visibility within chroot jail directories
Web presence step by step is a series of posts that show you to how to build a web presence.
In this post, we do advanced configuration on an Ubuntu Linux cloud server to create a Linux Apache MySQL PHP (LAMP) web server.
A note re MySQL and MariaDB
A few years ago, the company that owned MySQL was purchased by Oracle. The open source code was legally “forked” into a project called MariaDB. When this document refers to “MySQL,” it is actually referring to the MariaDB descendant of the MySQL database engine, made possible by the terms of the GPLv2 open source software license. Notice that to maintain compatibility with existing software, the command to invoke MariaDB on the command line is “mysql.”
This post assumes that you have performed the steps described in Chapter 5: Configuring an Ubuntu Linux cloud server to create a Linux Apache MySQL PHP (LAMP) web server, Part 1.
Configuring the Linux Apache MySQL PHP (LAMP) web server
In the previous chapter, Chapter 5: Configuring an Ubuntu Linux cloud server to create a Linux Apache MySQL PHP (LAMP) web server, Part 1, we used apt to install the meta-package “lamp-server,” which installs the components for a basic Linux Apache MySQL PHP (LAMP) web server. In this chapter we configure the components.
Installing MPM-ITK
We need to install MPM-ITK, which allows the web server to execute programs under different usernames. This means that if a website has a security issue, the damage is limited to that website’s directory: other websites and the host server should remain unaffected.
Enter the command:
apt install libapache2-mpm-itk
Configuring MySQL
The MySQL database server has been installed, but must be configured.
Enter the command:
mysql_secure_installation
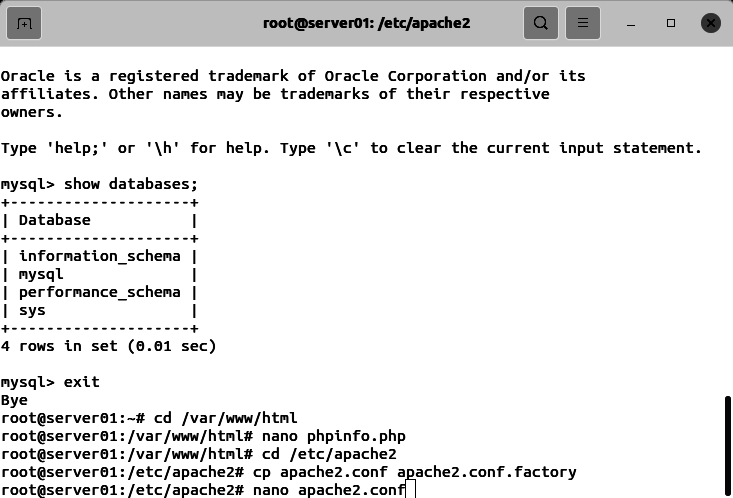
Testing the MySQL server
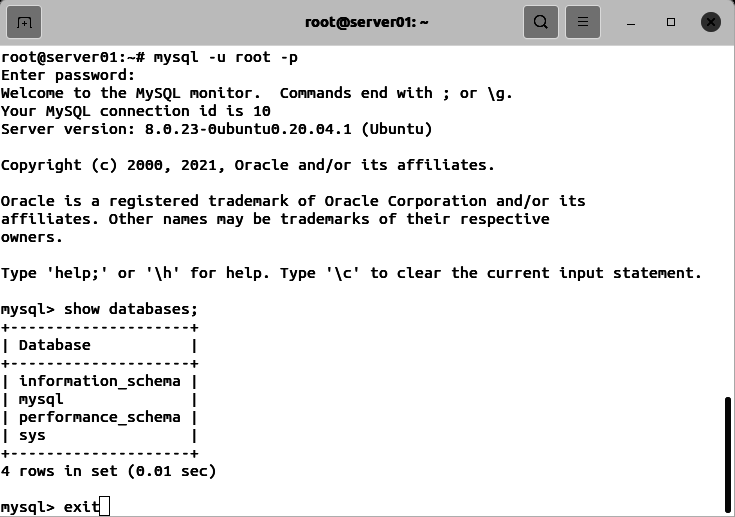
Let’s test the MySQL server. Enter the command:
mysql -u root -p
enter the password you specified during the MySQL configuration step.
enter the command:
show databases;
You will see a list similar to the following. Enter the command:
exit
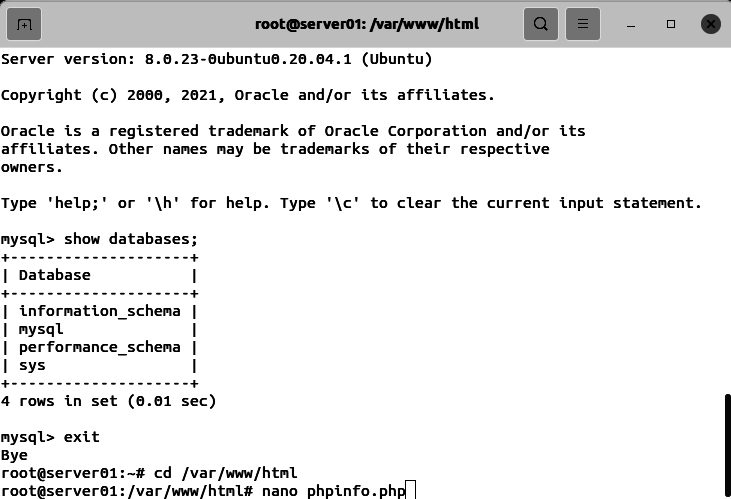
Testing that the web server is able to run PHP scripts
Let’s test that the web server is able to run PHP scripts.
Enter the commands:
cd /var/www/html
nano phpinfo.php
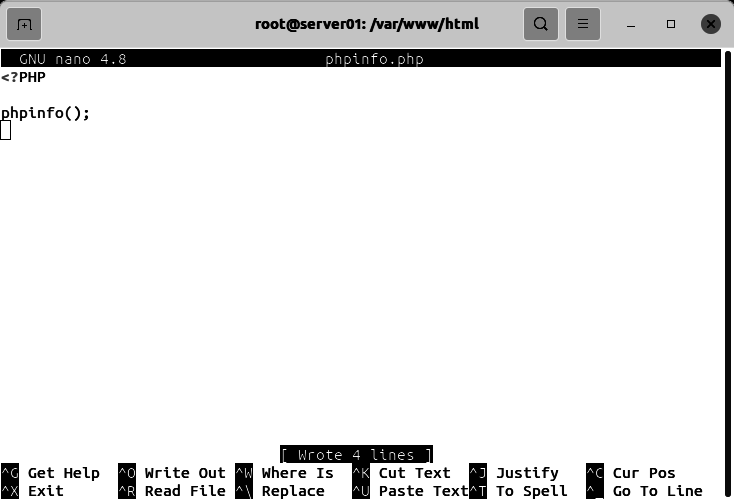
Enter the following text in the nano editor. Save and exit the file:
<?PHP

phpinfo();
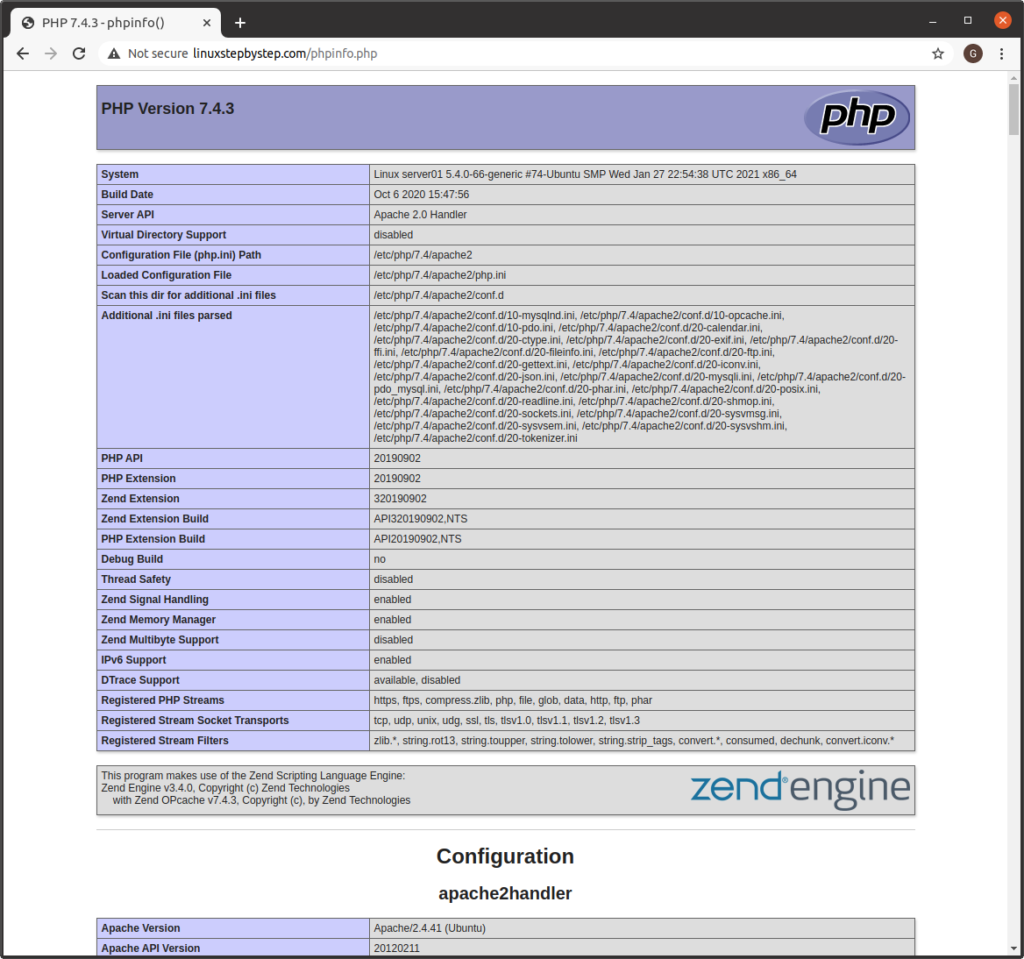
Use a web browser to load your domain name, followed by /phpinfo.php, as in:
linuxstepbystep.com/phpinfo.php
If you are successful, a page similar to the following should appear:
Configuring the Apache web server
Enter the commands:
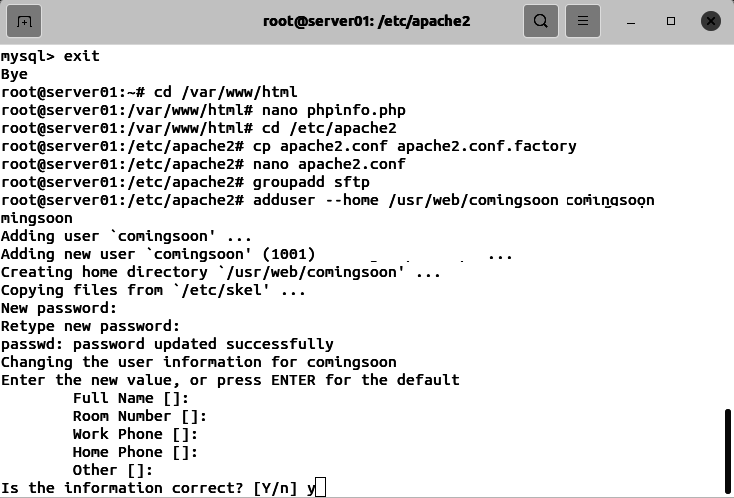
cd /etc/apache2
cp apache2.conf apache2.conf.factory
nano apache2.conf
Use the control-w command to search for the text “<directory”:

This is what it looks like when you find the section:
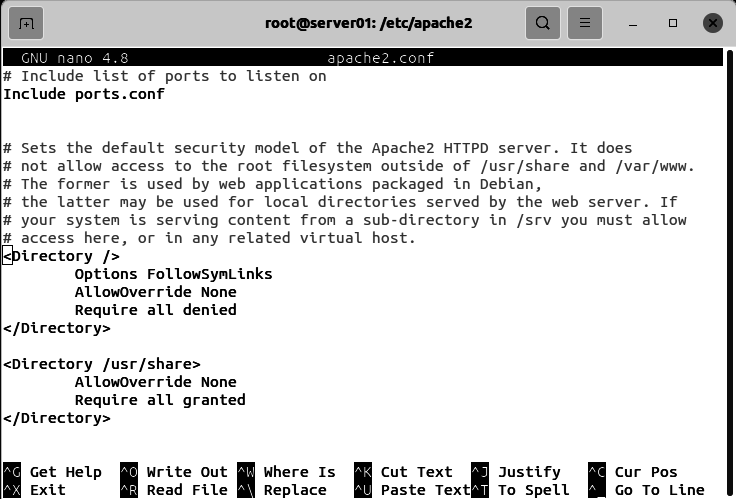
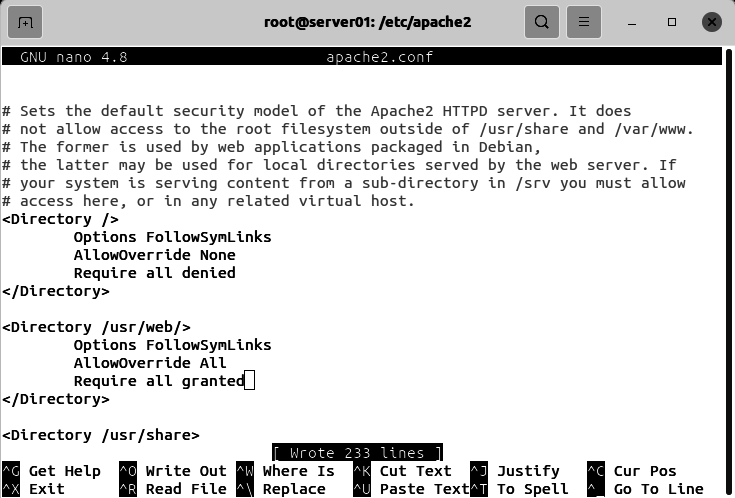
Insert a block with the following text:
<Directory /usr/web/>
        AllowOverride All
        Require all granted
</Directory>
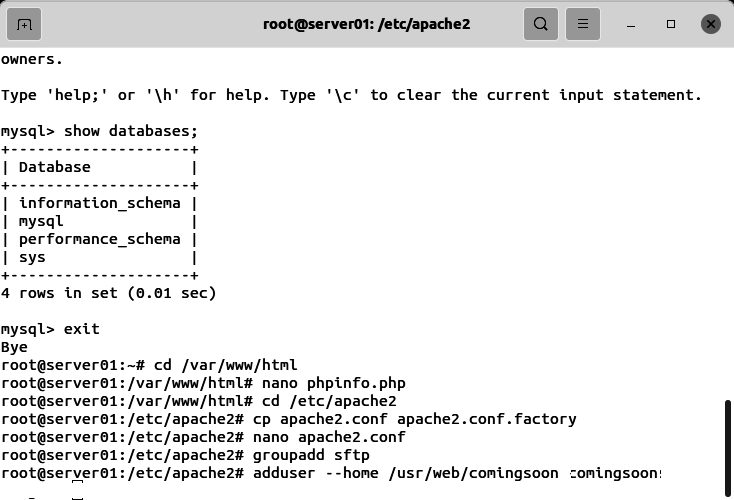
Creating the users, directories, and documents for the websites
Enter the commands:
adduser --home /usr/web/comingsoon comingsoon
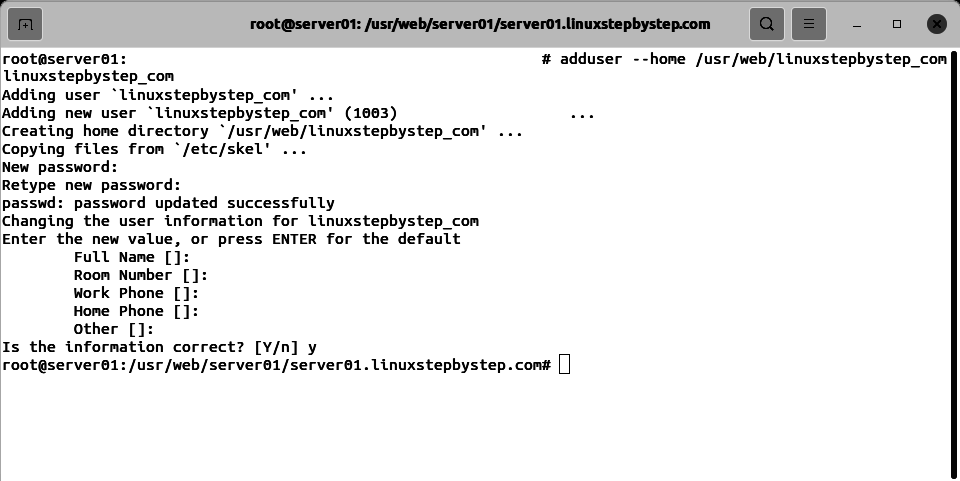
Enter and confirm a password for the user. Answer the prompts for additional information. When asked: “Is the information correct?” enter “y” for yes:
Enter the commands:
mkdir -p /usr/web/comingsoon/comingsoon
cd /usr/web/comingsoon/comingsoon
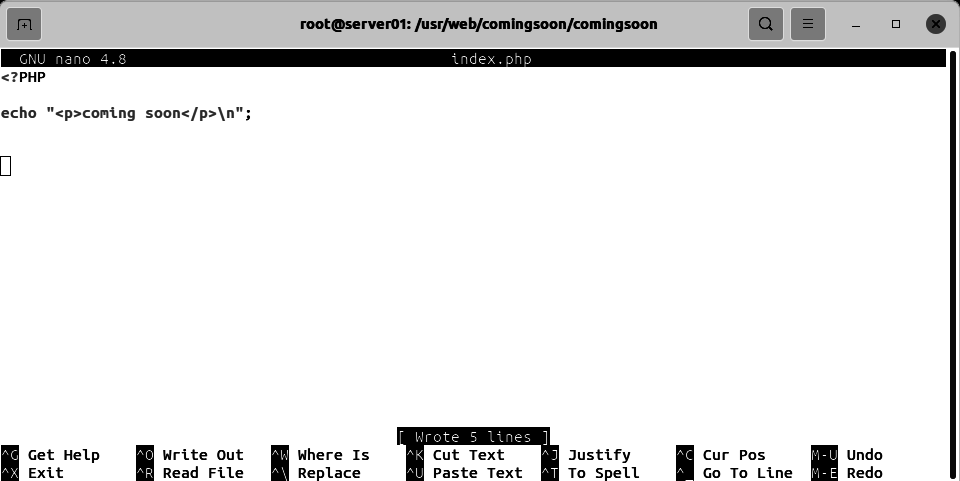
nano index.php
Enter the following text in the nano editor. Save and exit the file:
<?PHP

echo "<p>coming soon</p>\n";
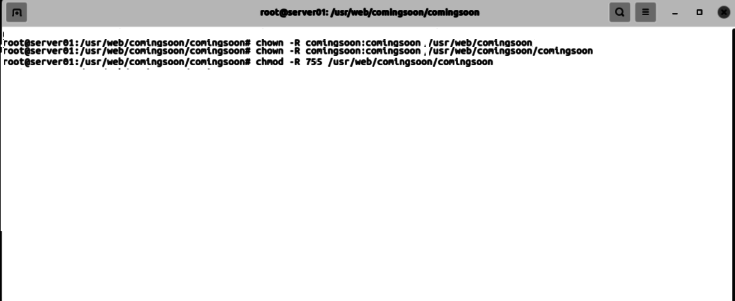
Enter these commands, note that each “chown” and “chmod” command should be its own line:
chown -R root:root /usr/web/comingsoon
chown -R comingsoon:comingsoon /usr/web/comingsoon/comingsoon
chmod -R 755 /usr/web/comingsoon/comingsoon
A note about the example domain and a reminder that you should use your domain name in its place
Note: for clarity and narrative flow we are using the example domain linuxstepbystep.com but you should substitute your domain name as appropriate.
Enter this command (all on the same line):
adduser --home /usr/web/linuxstepbystep_com linuxstepbystep_com
Enter the commands:
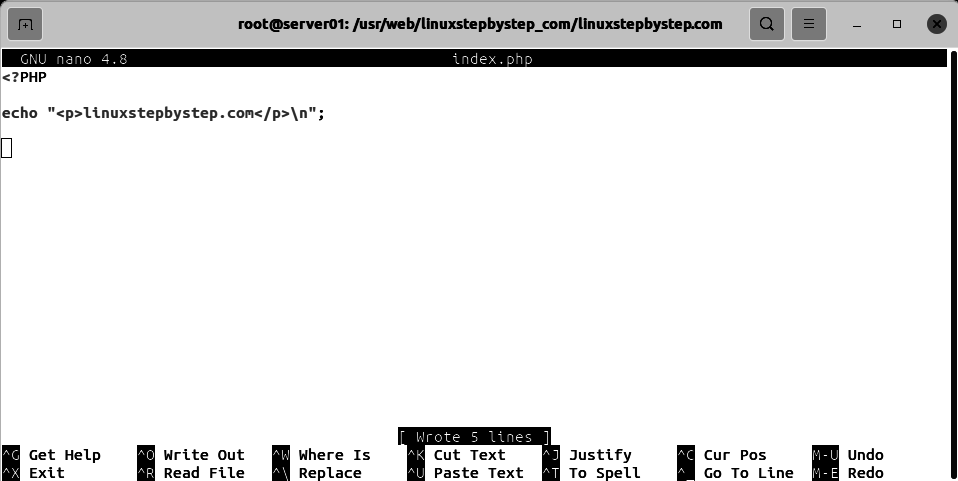
mkdir -p /usr/web/linuxstepbystep_com/linuxstepbystep.com
cd /usr/web/linuxstepbystep_com/linuxstepbystep.com
nano index.php
Enter the following text in the nano editor. Save and exit the file:
<?PHP

echo "<p>linuxstepbystep.com</p>";
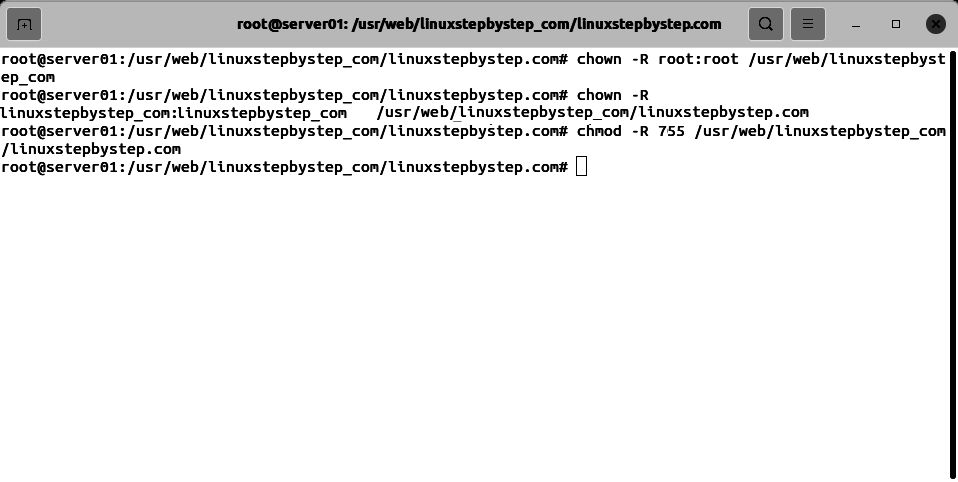
Enter these commands, note that each “chown” and “chmod” command should be its own line:
chown -R root:root /usr/web/linuxstepbystep_com
chown -R linuxstepbystep_com:linuxstepbystep_com /usr/web/linuxstepbystep_com/linuxstepbystep.com
chmod -R 755 /usr/web/linuxstepbystep_com/linuxstepbystep.com
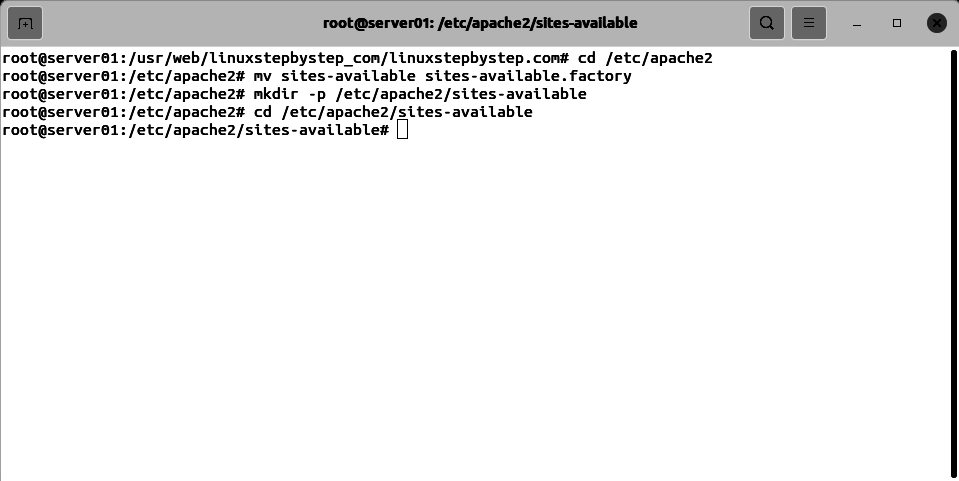
Creating the virtual hosts for the websites
cd /etc/apache2
mv sites-available sites-available.factory
mkdir -p /etc/apache2/sites-available
cd /etc/apache2/sites-available
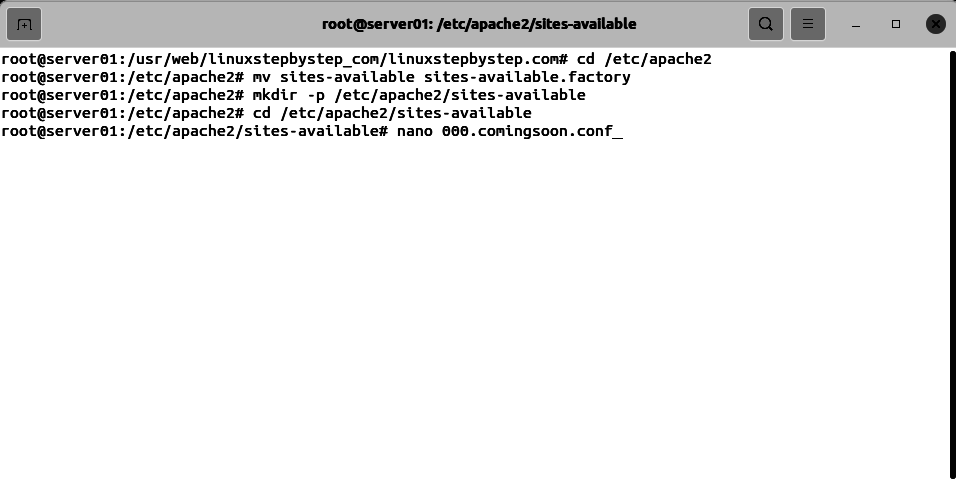
Enter the command:
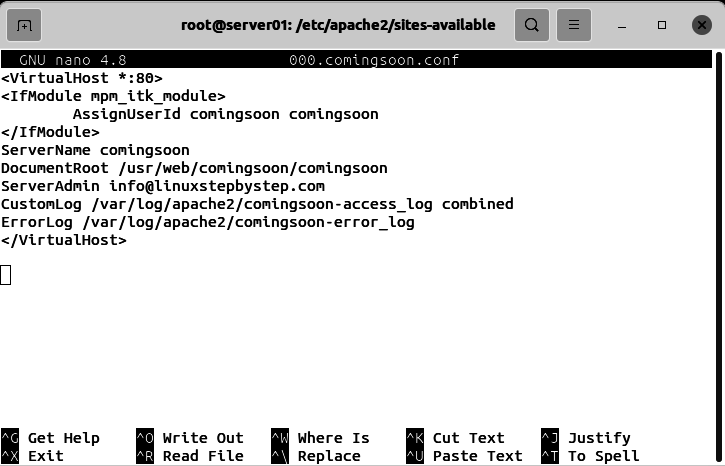
nano 000.comingsoon.conf
Enter the following text in the nano editor. Save and exit the file:
<VirtualHost *:80>
<IfModule mpm_itk_module>
        AssignUserID comingsoon comingsoon
</IfModule>
ServerName comingsoon
DocumentRoot /usr/web/comingsoon/comingsoon
ServerAdmin info@linuxstepbystep.com
CustomLog /var/log/apache2/comingsoon-access_log combined
ErrorLog /var/log/apache2/comingsoon-error_log
</VirtualHost>
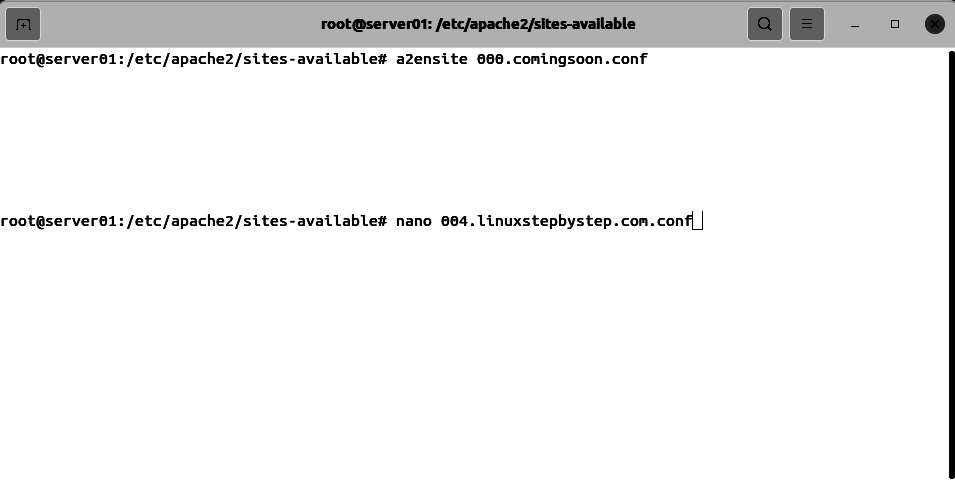
Enter the commands:
a2ensite 000.comingsoon.conf
nano 004.linuxstepbystep.com.conf
Enter the following text in the nano editor. Note the screen capture: the line starting with “AssignUserID” should be all on the same line. Save and exit the file:
<VirtualHost *:80>
<IfModule mpm_itk_module>
        AssignUserID linuxstepbystep_com linuxstepbystep_com
</IfModule>
ServerName linuxstepbystep.com
ServerAlias www.linuxstepbystep.com
DocumentRoot /usr/web/linuxstepbystep_com/linuxstepbystep.com
ServerAdmin info@linuxstepbystep.com
CustomLog /var/log/apache2/linuxstepbystep.com-access_log combined
ErrorLog /var/log/apache2/linuxstepbystep.com-error_log
</VirtualHost>

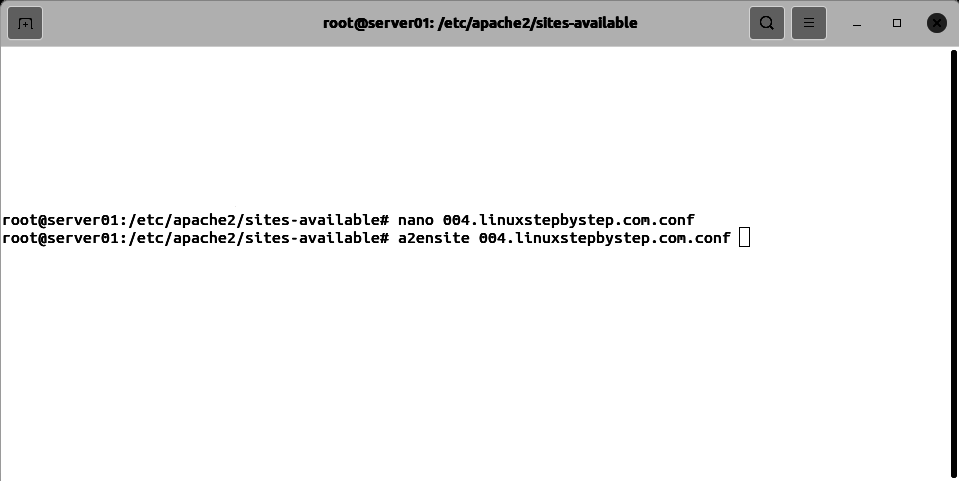
Enter the command:
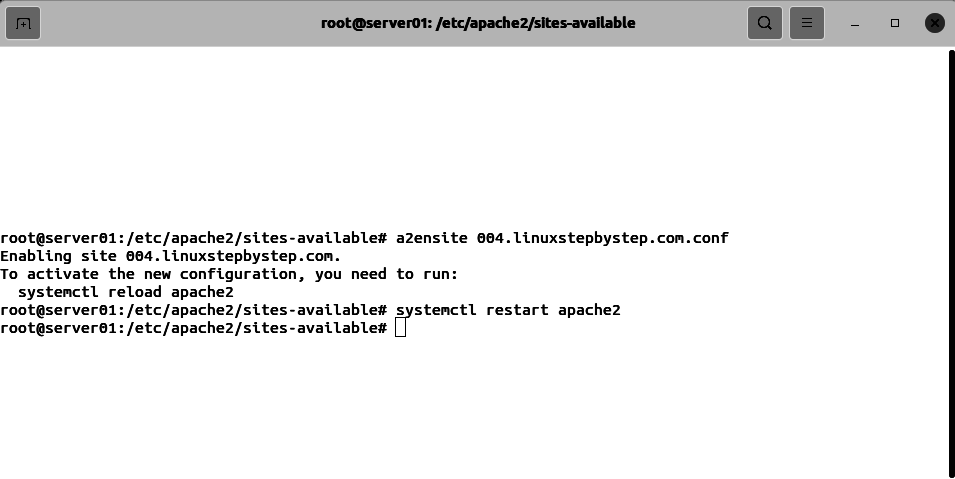
a2ensite 004.linuxstepbystep.com.conf
Enter the command:
systemctl restart apache2
Testing the web server to see whether it can host separate virtual hosts (multiple websites)
The objective of this test is to display different text for each host name we enter in the web browser’s address bar.
Enter your domain name in a web browser’s address bar:

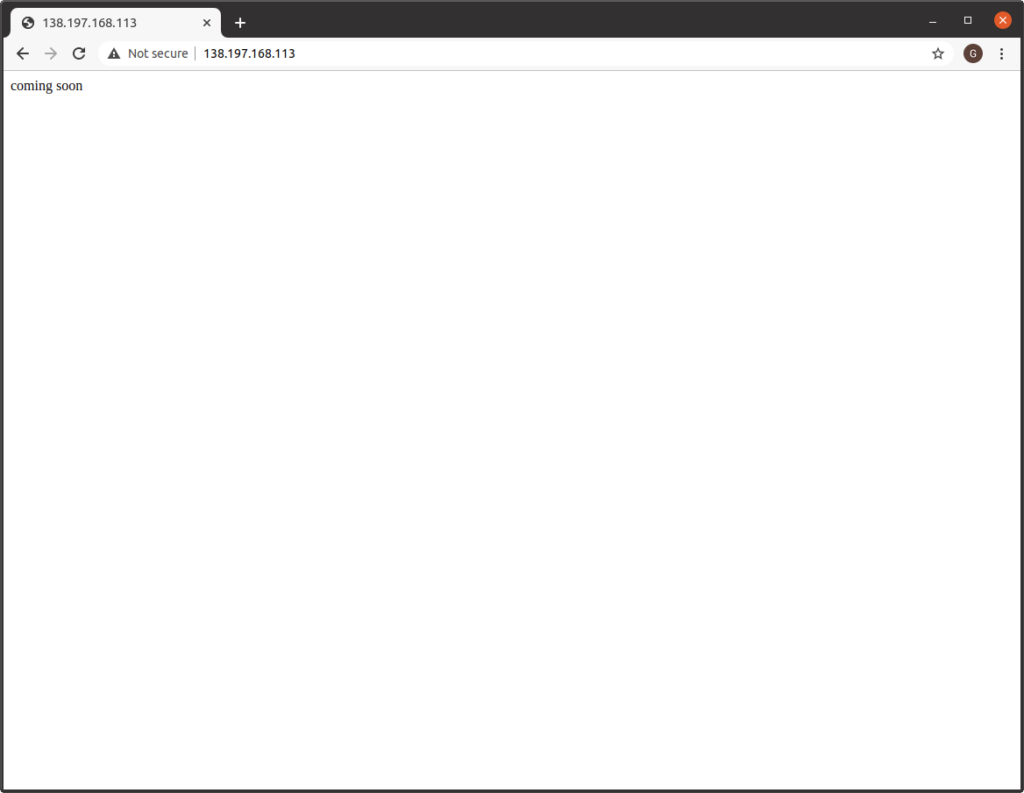
Enter the IP address of your cloud server in the web server’s address bar. This is to test whether the default “park page” is active. This page will be displayed if a host name is pointed at the IP address of the cloud server, but the cloud server’s web server has not yet been configured with a virtual host profile for that host name.
Installing SSL Encryption with Let’s Encrypt
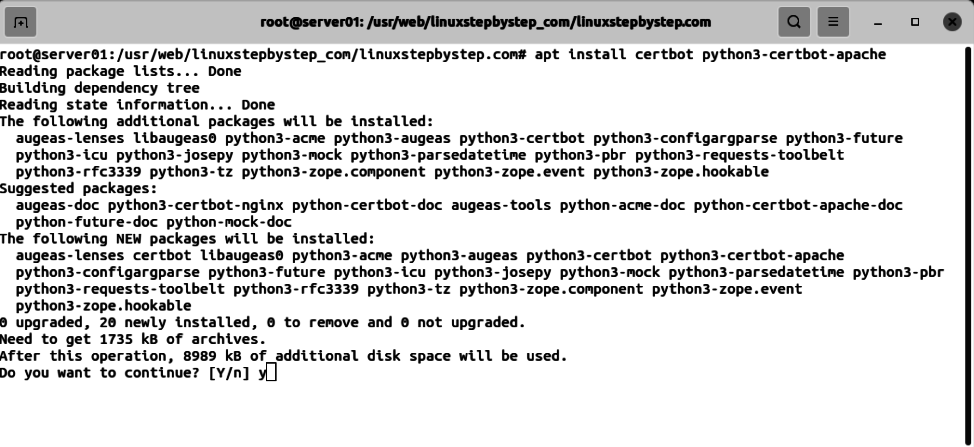
Enter the following command:
apt install certbot python3-certbot-apache
Do you want to continue?
Enter “y” for yes:
Enter the command:
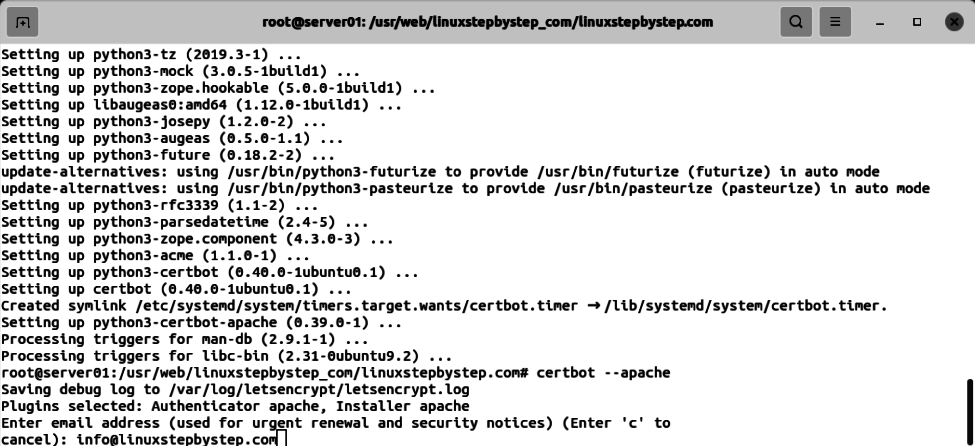
certbot --apache
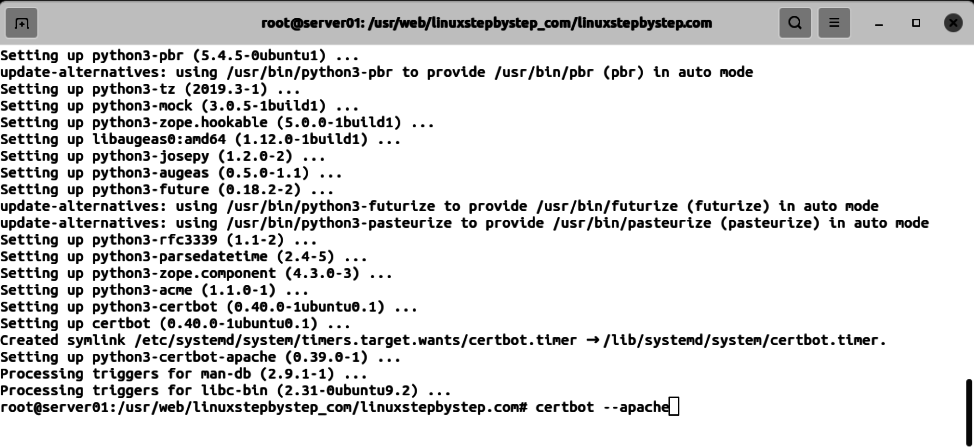
Enter an email address:
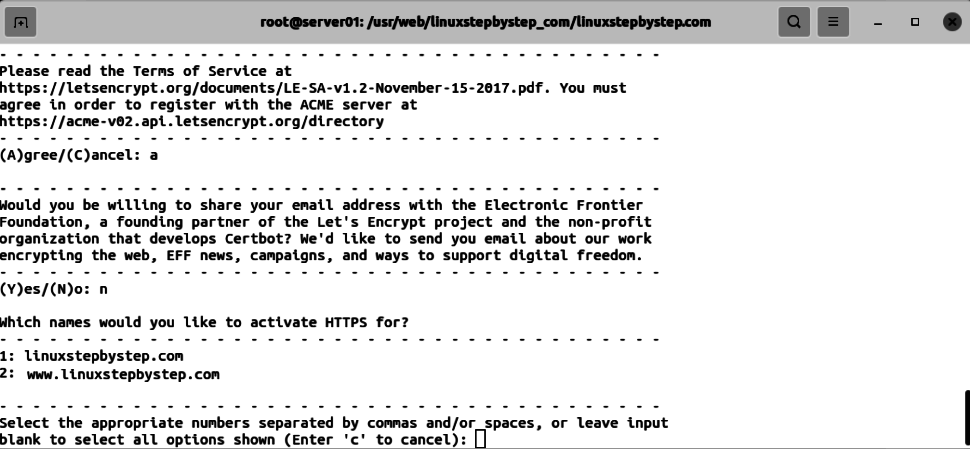
Please read the Terms of Service at
Enter “a” for agree
Would you be willing to share your email address
Enter “no” for no
Which names would you like to activate HTTPS for?
leave input blank, press Enter:
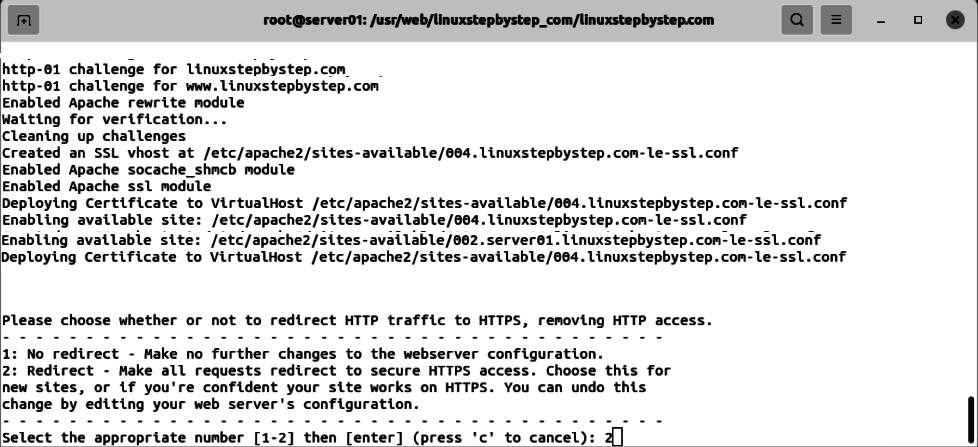
Please choose whether or not to redirect HTTP traffic to HTTPS
Enter “2” then press Enter:
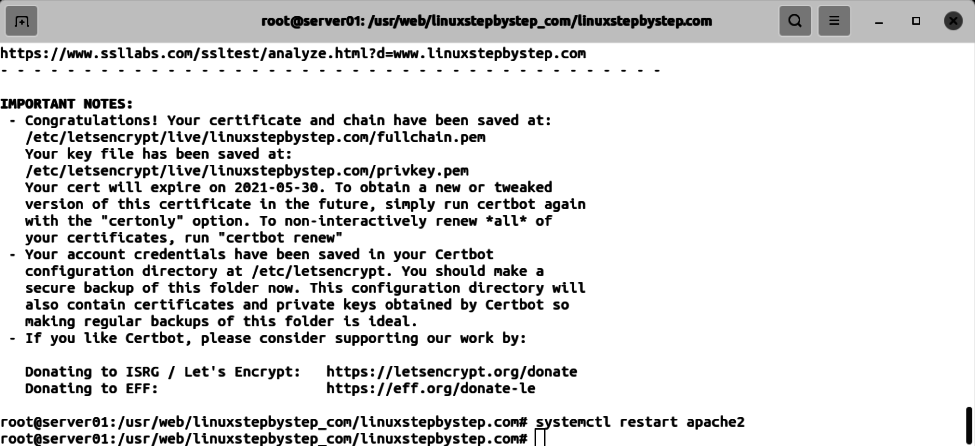
Enter the command:
systemctl restart apache2
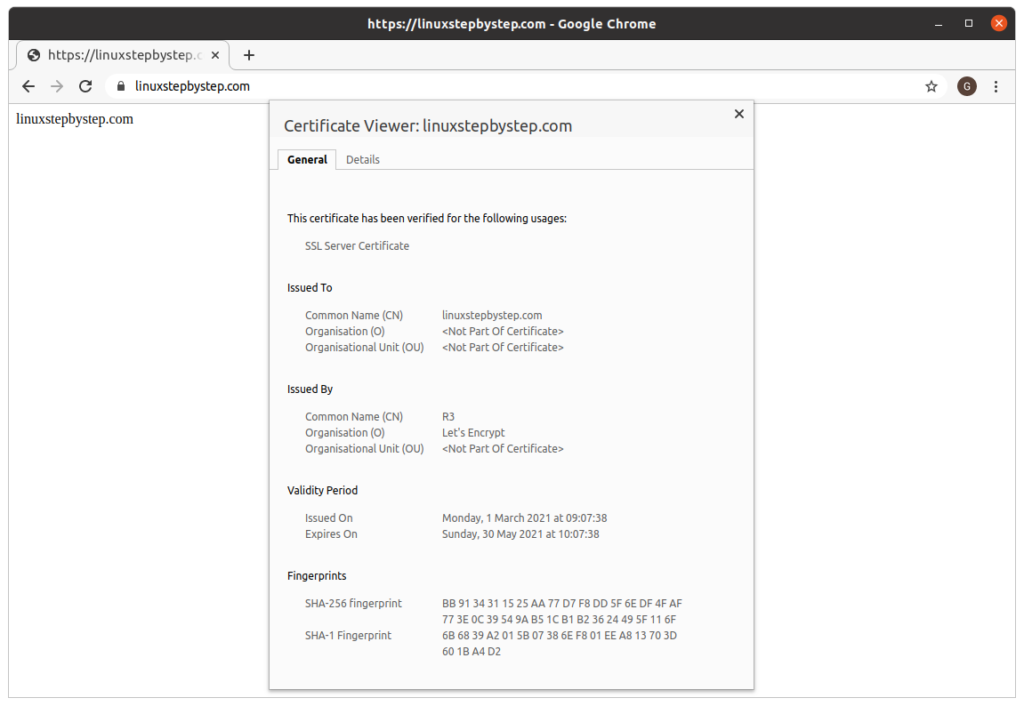
Enter your domain name in a web browser’s address bar.
Notice the little lock symbol to the left of the host name. Click on the lock symbol, Click on Certificate. View the certificate’s details:
Previous step: Chapter 5: Configuring an Ubuntu Linux cloud server to create a Linux Apache MySQL PHP (LAMP) web server, Part 1
Next step: Chapter 7: Configuring the SSH server on an Ubuntu Linux cloud server to limit SFTP directory visibility within chroot jail directories